Showing posts with label skirt. Show all posts

Saturday, December 31, 2011

Mum's wedding outfit

For the same weddings as I wore my strawberry shortcake dress, I made my Mum's outfit. I need to get more photos of it, and photos of the individual garments, and there will eventually be a jacket out of the skirt fabric, but here it is so far:

DSCF4552

DSCF4558

The jacket and shirt are made from green chiffon, the undershirt is made from a green satin, and the skirt is a gorgeous embroidered silk.

Perhaps the most amazing thing about this outfit is that it was finished. Eleventh hour sewing if I ever did it, it was finished the day before I flew across the country to Perth for the first wedding. I'm really happy with the skirt, undershirt and skirt, although the jacket still needs work. The silk one is going to be perfect. It doesn't have a choice :P

The skirt has a hand picked zipper and a hand picked hem - two of my favourite elements of this outfit. All the tops are finished with self bias binding.

Oh, and I'm counting this as my 'Mum' challenge for the sew weekly. (I decided to make the challenge my own, and rather than sewing something inspired by mum, I sewed for mum).

Wednesday, December 21, 2011

Some Gifts - clothing

First off, I have to apologise about the bad photos for both of these. I was slightly restricted for time for both of them - I gifted them the same day I made them.

Both of these dresses are being counted towards my Sew Weekly challenges for the year. In fact, I am using the dress, skirt and top to check off three of the challenges.

Firstly, a red dress for my friend D. I visited her in Perth recently, and ended up giving her the red and black lace look dress. This one.

DSCF4098

She also mentioned that she really liked the style, but couldn't find anything like it in the shops. And that she was looking for a red dress. So, I made her one. I counted it as my "Do Over" item - it's exactly the same pattern, no alterations made, just made a second time around.

The dress is made from a red fabric I had in my stash, using thread from my stash and a pattern I'd used previously - meaning that it essentially cost me nothing.

DSCF4477

Next, for my housemate C, who has vowed that she isn't allowed to buy any more black clothing, I made a skirt and a blouse. The skirt is counting towards the "Orange" Sew Weekly challenge, and the blouse is counting towards the "Patternless"challenge (although both of them are patternless).

C has been lusting after orange skirts, and mullet skirts (which I keep referring to as tulip skirts). I remembered that a while back, I had pinned this tutorial (which was featured on craftgossip) for a fishtail skirt.


Using that as my basis, and some thrifted orange cheesecloth in my stash, plus some new pink bias binding for the hem and waistband, I created a gathered waist version for C. For the top, I again used something that I'd seen on craftgossip, a tutorial for a wrap top. Which was inspired by the vintage photo below.


Between the two of them, I'm very happy with the result. Both of them are adjustable enough to suit C, and allowed me to not need to surreptitiously gain any of her measurements.

The top used new fabric, bias binding and satin binding, and the skirt used new bias binding. All up, it cost me about $15 to make the outfit.

DSCF4510

I used a double layer of warm white rayon, with a white cotton bias tape for the thin tie, and cream satin blanket binding for the thicker tie. Although, I may have to shorten each of the ties. But, that can come later.

Monday, October 3, 2011

Self-Stitched-September Item 5


One of the most recent challenges for Sew Weekly was the Autumn palette challenge. As it's going into Spring here, it seems a bit silly to be putting together a Autumn palette, so I've put together a Spring palette. I have been buying three colours lately: oranges, pinks and reds. So, I have three palettes: Burnt, Rose and Blood


Burnt


I've been thinking about making a bias tape skirt for a while now. I've seen them worn by people a few times, but I've never seen one for sale. So, I thought I would make one myself. I fell in love with the fabrics I used to make the bias tape while standing in line at Spotlight. It's quilting cotton, and were pieces designed as 'stash builders.' And, perfectly suited to my 'burnt' palette. I ended up making 44m of bias tape for this skirt, and used almost all of it - I think I have about 2 meters left.

I used my A-Line skirt pattern for the basis of this skirt, and just held the bias strips in place as I sewed. I sewed the bias strips on closer together near the hem, and further apart as I got higher. (Please excuse the rumpled shots: I had worn the skirt on Friday night, forgot to photograph it, and it spent the weekend crumpled at the end of my bed)


DSCF4302

DSCF4303

DSCF4304

DSCF4305

DSCF4306
The Facts
Fabric: for bias tape: 3x 110x70cm pieces@ $7.00 each, total $21.00; remnant of orange poplin, $ 3.50
Pattern: Self drafted A-Line skirt pattern
Year: 2011
Notions: Zipper, $3; thread from stash.
Time to complete: 4 hours
First worn: September 2011
Wear again? Yes
Total Cost: $ 27.50

Saturday, September 17, 2011

Self-Stitched-September Item 2

So, a while back, I pinned this skirt from anthropologie on pinterest:


Cool, isn't it?


Then, I remembered I had downloaded this pattern from Neu4bauer, available here:


The vintage pattern was available for free download, and reminded me of the anthropologie skirt. Although, I was never into the yellow colour of the anthropologie skirt (yellow is a colour that isn't in my wardrobe anywhere. It just isn't my colour).


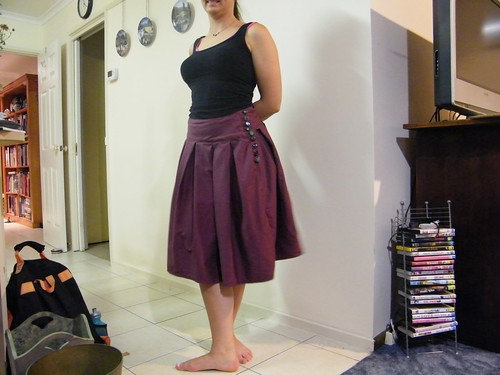
I made just the skirt from the pattern. I forgot that vintage patterns tend not to include seam allowances, so just sewed it up with my normal 1.5cm seam allowances. The original hip measurement was for 106cm. My hips are 100cm, so with the seam allowances, it ended up being a perfect fit. And not the perfect-around-the-hips-but-way-to-big-around-the-waist fit I'm used to with modern patterns, but a perfect fits-my-waist-and-hips-fit. I was shocked and pleased.


See, the entire reason I have no high waisted anything in my wardrobe, is because if it fits my waist, it doesn't fit my hips and  vice versa. So for this pattern to fit first go was so surprising, and nice, and well, I think I'm going-to-make-again worthy. It wasn't the easiest pattern to make, but totally worth it.


And here is the point this skirt became a UFO. I had made the skirt up to the point where I needed to make button holes and hem the skirt. I knew I wanted to make bound button holes, but somehow I didn't do it. I know I started this skirt in the first week of July, because I started it the weekend before my last week at my public service job. And, I finished up to the no-button-holes-or-hem point. Then I hung it on a hanger, put it on the hook behind my bedroom door... and sorta forgot about it. Well, more, I put clothing on top of it.  Then, I was tidying my room this week, and actually put the thinks hung on the back of my door into the wardrobe. And the skirt resurfaced. So, I thought it was the perfect opportunity to finish the skirt.


For my fashion course, I am making a jacket with bound pockets and button holes. So, I made samples to go in my folio for class, and then used the technique I'd just learnt to make 5 buttonholes in my skirt. I sewed the buttons on (with a fancy thread shank and everything!), and hemmed the skirt. And getting the pleat hem length even was hard.


DSCF4247


And then, I had a finished, wearable skirt!


DSCF4240


I wore this skirt on Wednesday, and was amazed just how comfortable it was. I kinda felt like I had stepped off the set of Mad-Men (not having ever watched that show, it was more the secretary-vibe I got from the outfit). I have even worn it again - to a job interview on Friday. Although the weather is warming up, so soon the skirt will just be too warm to wear, I have a feeling it's going to become a winter staple for me.


I am a using this skirt as the Sew Weekly UFO item, as well as being the second item I have sewn for Self-Stitched-September '11.


DSCF4242
The Facts
Fabric: Thrifted Wool from Stash
Pattern: Downloaded vintage pattern from Neu4bauer, available here, free.
Year: 1950s, I think
Notions: Thrifted buttons, $2.00; thread
Time to complete: I honestly have no idea. Finishing the hem and button holes probably took about 4 hours.
First worn: September 2011
Wear again? I already have - to a job interview on Friday.
Total Cost: $2


Friday, September 9, 2011

Self-Stitched-September Item 1

As you remember, I have pledged to make (and wear) 6 new items for Self-Stitched-September this year. To give myself a bit of focus to do this, I have decided to use challenges set by the awesome Mena at Sew Weekly. I'm going to be doing a bit of picking and choosing, and although I want to get caught up with the challenges, I may not actually achieve that. And to get caught up, I may cheat and use things I have already sewn (although, I won't be counting them towards SSS '11).

DSCF4205

The first thing I planned to make was a skirt inspired by the Piped Sailor Skirt from Anthropologie. It's been pinned to my pinterest style board for a while now. I love the contrast of the dark piping lines and warm skirt colour. The buttons add just that little bit of 'pop.'


I used the free Kasia pattern from BurdaStyle with some thrifted red corduroy, and black piping.


Extending the straight line down from the pockets, I added a line of piping. I also got rid of the pockets (I tend not to use pockets) and, the front bib, instead putting in a centre back zip. I had to resize the gathered front panel after getting rid of the pockets, and resized the yokes, so that the piping would line up properly.


I have, up until this point, tended to steer clear of high waisted skirts. The simple reason for this is that there are generally 4 sizes between my waist measurement and my hip measurement. For this pattern, my waist was a 36 and my hips were a 40. I decided not to do a muslin (really not sure why) and to just cur a straight size 40. Which, no surprises, was miles too big for me around the waistband. But the hips fit really well. So, I took a bit in from the side seams, and a bit in from the back seam. Most of the excess was taken in from the centre back seam, as the gathers on the hip accentuate the hips a bit, and I really didn't want to accentuate them any more. 


DSCF4193

DSCF4194

DSCF4195

DSCF4196
I even managed to get the piping to line up on the zip!
I really ummed and aahed about which challenge this should fit into. Should it be Rule, Britannia? Or Ahoy, Matey!? The piping gives it a nautical feel, but the red makes it feel more British... Part of my conundrum was that I don't like most of the 'sailor shirt' styles. I can do stripes, but those collars just put me off. I'm trying not to buy anything new, and I know that I don't have any striped knits in my stash, so that ruled making a striped T-Shirt to go with the skirt. Then I saw this.

Just enough of a stripe and detailing to make it feel nautical, but not so much that it has the costume-y collar look. So, that became my inspiration for the top. Although I usually go for a more fitted style, the high waist of the Kasia really lends itself to a less fitted style that gets tucked in. 


Using the free 1 piece Kimono Tee pattern, I redrafted the neckline and added a seam below the bustline to allow for the navy stripe. I also shortened it about 10cm. I made a plain version of this up (which I'm planning on counting towards another Sew Weekly challenge), and it came down to my hips. Which is fine, but leaves just a bit too much excess fabric to have ride up during the day when it's tucked into the high waisted skirt. Less length is less to ride up, and it's still long enough for me to tuck in.  I'm really happy with how this turned out, even if I did manage to (completely by accident) draft the line straight across my nipple line. Oh well. And, I'm really please with the look of the crepe scraps with the solid knit.


DSCF4197


The Facts
Fabric: Thrifted Red Corduroy from stash; White Cotton knit from stash; Navy crepe fabric scraps

Pattern: Kasia pattern Free; 1 piece Kimono Tee Free
Year: 2011
Notions: invizible zipper $2.00; piping cord from stash; thrifted buttons $0.50
Time to complete: Kimono Tee: 1 1/2 hours, including redrafting neckline.
First worn: September 2011


Wear again? Yes! It's a super comfy outfit.
Total Cost: ~$ 2.50


DSCF4204

DSCF4202

DSCF4200

Wednesday, July 20, 2011

8 in 28 item 8

So, I think that I've taken longer than my prescribed 28 days to finish this challenge.

And you know what? I'm okay with that. Because even though it has taken me longer, I did finish it, I'm out of the weird rut I was in (well, not so weird, I know exactly why I was in the rut, I was just frustrated and didn't want to see anyone, or sew, or really do anything), and I had a successful weekend sewing.

So, without further ado, here is my final item. A navy blue 'swirl' skirt.

I picked this pattern up at an op shop for 50c, but I have a similar skirt in baby pink drill, and it's one of my favourite items of clothing - comfortable and swishy in all the right ways.

I got some navy stretch fabric - satin-y on one side, fairly matt on the other - from the op shop. It was 150cm wide, and about 2.5m long, which was perfect for this skirt. Because it uses a LOT of fabric. All the curves leave a lot of scrap fabric.

The zip went in really easily, which amazed me because I've never set a zip into a curve before.

I'm really pleased with how this one turned out. I've worn it several times since making it, even though it has to be ironed every time (and I really really hate ironing).

DSCF4009


DSCF4005

Cute, huh?

8 in 28 Item 6 and 7

So, while stalking pinterest (have I mentioned that my day job is incredibly quiet? And I don't have a whole lot to do? And I spend about three quarters of an average day surfing the web, reading blogs, and looking through pinterest posts? And, most excitingly, that I have quit, and only have 9 days left?! Well, yeah...) I came across these two skirts:

Source
Source
Both of which I thought were super cute, and I put them on my 'I must sew them' list.

Then, someone in my dance class turned up wearing something very similar. Which was kinda my final push to actually sewing one myself.

For the underskirt, I was originally going to sew something like this:

Source
But then discovered I didn't have any suitable fabrics (I know, right? I have a huge fabric stash, and nothing suitable). So that got put on the back burner while I made the overskirt.

I used a doona (duvet, quilt) cover I purchased at an op shop (thrift store) a few months ago. I loved the pattern with the kinda-seersucker quality. I just wasn't sure what to do with it. It was perfect for this project though.

Both the overskirt and the underskirt are based off my simple A-Line skirt pattern (so easy and quick to do, and it only needs 4 measurements! My tutorial is here)

Here is my finished overskirt:

DSCF4024

And then I discovered this:

Source
Isn't it pretty?

I was at a sewing shop picking up a darning foot for my machine, when I spotted some lace under their counter, and bought some. Turns out, it was exactly the right colours for my overskirt. I just didn't get enough of it.

So, I started the lace skirt as an underskirt, went out (to a different fabric store) and purchased much more (too much, but oh well, I now have plans for the extra lace), and sewed myself a lace skirt. And a bonus, it works both as an underskirt, and by itself!

DSCF4016

Each of the layers of lace are different, and the bottom one has a green tint that picks up the green hue of the overskirt and the buttons.

Sunday, June 26, 2011

Basic (fairly full) A –Line Skirt Tutorial

This skirt is super simple to make, and needs just four measurements:

1: Waist (or, where you like your skirt waist bands to sit) +ease (I like about 2cm ease). Divide this number by 4.
2: Hips (remember, this is the widest part of your hips) + ease (I like about 2cm ease). Divide this number by 4.
3: Distance between your waist and hips
4: Distance from your waist to the hem

You will end up with a simple A-Line Skirt (which I will post pictures of once I find my camera cable), with a zip in the left hand seam.

Take a large piece of paper. I used a full page of a broadsheet newspaper.


Draw a straight line along the side of the paper. This will be your centre seam.


Mark three points on this line:

A: Waist
B: Waist to hip distance
C: Waist to hem distance


Draw a slightly curved line from the waist measurement. This will be the top of the skirt. Mark your waist measurement along this line.

Draw a slightly curved line from the hip point, parallel to the waist line. Mark your hip measurement along this line.


Draw a straight line from the points you just marked. Mark the waist length on this line


To mark the lower hem, measure multiple points from the waist band the hem length.


Join these marks


Mark the centre front ‘cut on fold’ and the skirt pattern ‘No Seam Allowances’


And, you’re done.


P.S. If you like a facing for the waistband, or a yoke, you can simply cut along your hip line, and remember to add seam allowances.

P.P.S. If you prefer your zips at the centre back, when you cut the fabric, cut one piece on the fold, and two pieces not on the fold, adding seam allowances at the centre back.

Friday, May 27, 2011

8 in 28, or giving myself a deadline

I have been realising over the last few weeks, as I put together the 'taking stock' posts, that with a deadline, I sew very effectively. Without a deadline, and i get basically nothing done.

So, in the interests of actually acheiving some sewing, and reducing my stash over the next few weeks, I am seeting myself the 8 in 28 challenge.

Basically, this means I am aiming to finish 8 items in 28 days.

And yes, I do know that means I will need to sew 2 things per week. I can sew a fully lined dress start to finish in a day, so I should be able to acheive this.

I ams etting myself more items that the challenge, to allow for any mishaps along the way, or feeling unispired by something, or, really any other impediment to me actually finishing a set item. Plus, a little bit of choice is always nice, isn't it?

My plan for the challenge:

Item 1: Red Ruffle Skirt

I have a gorgeous red crepe that is just begging to be used. It's a red-red, and has been sitting in my stash for about 9 years. I made a wrap around skit with some of it, but I have a heap left over.

When I saw this skirt inspired by an Anthropologie skirt, I knew exactly what I wanted to do with the rest of the red crepe.

Source


Item 2: Green and Black Skirt

The skirt below was always meant to be a shell, so I figure I should actually make the skirt that I was making the shell for.


Item 3: Pink and Black piped Dress

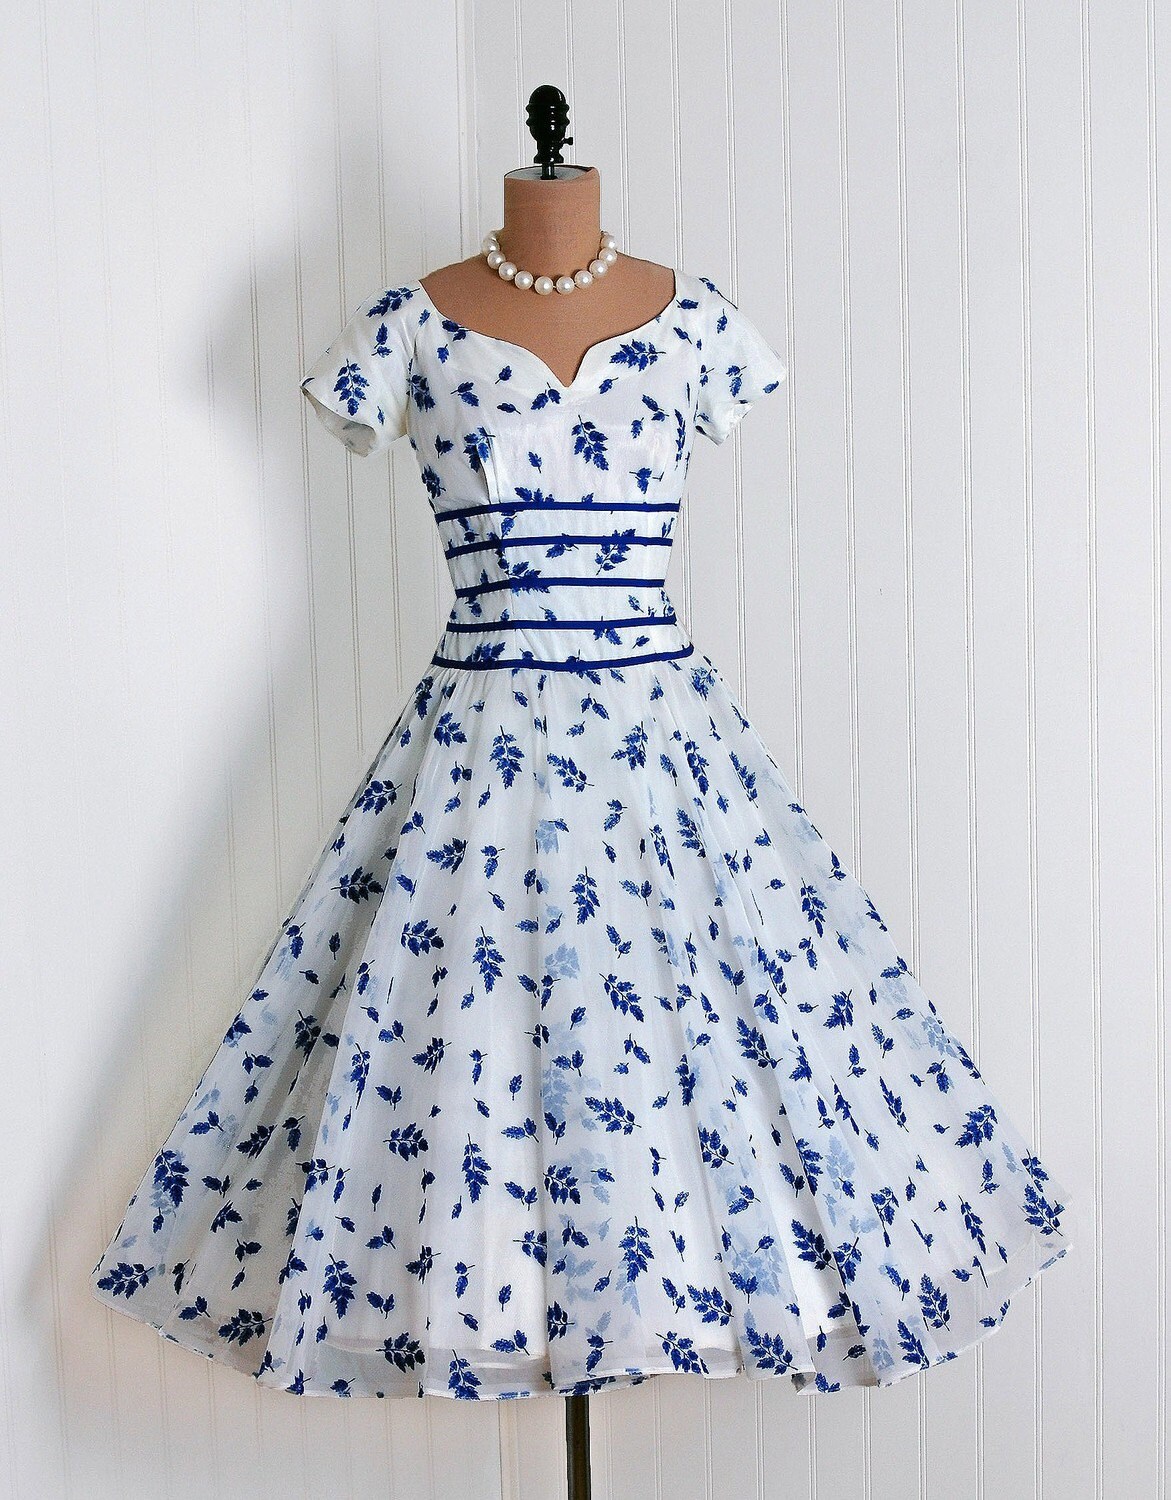
I've found pinterest, and I now spend what could be considered too much time on it. But, I have been inspired by this dress (from an etsy seller, and now sold, plus it's vintage, so I don't feel so bad about using it as inspiration - I think I might even try to replicate the neckline. I mainly don't feel bad about it because it's not something that I could buy now, and even if I could buy it, none of the proceeds would be going to the designer or maker).

Source via pinterest
Item 4: Tara Dress

After seeing the Tara Dress Frock by Friday at grosgrain, I have a gorgeous fabric that I think would make a lovely Tara dress

Source


Item 5: Tara Top

Also inspired by the Tara dress, I'd like to make a Tara Top.


Item 6: Duro Dress

Inspired by seeing the Duro Dress on a dress a day, (she has a lot of duro posts. This is just one of them,) I bought the pattern. Which was 4 months ago now. So, I think I should make it.

Source


Item 7: 1950s wrap dress

This is another dress I was inspired by a dress a day to try, using Butterick 1952, a retro pattern reprint.

Source via a dress a day

Item 8: Button overskirt and cream underskirts

This one is just cute. I love the way that the coloured underskirts peek out from under the dark denim.


Item 9: Black and red wool skirt

I don't have a specific image in mind, maybe an A-line skirt?

Item 10: 3 cushion covers

I don't have a pretty picture of the cushion cover for you, but really, they are cushions. Squares of fabric with a zip in the back.

Item 11: baby cord leaf skirt  with underskirts

Again, from pinterest, like this one:

Source: etsy.com via Helen on Pinterest

I have all of the fabric and notions to complete all these items except the piping and contrast fabric for the pink and black piped dress. So, I should manage to get some good stash busting out of this :)