Showing posts with label sewing basket challenge. Show all posts

Tuesday, October 12, 2010

Sewing Basket Challenge - Ribbon Back Dress

Hey. Hope you're all having a great day.

As refashions go, this one was pretty easy.

I had sewn this dress years ago, back when my waist was a few cm smaller. I know that doesn't seem like a big difference, and for most items of clothing, honestly, it isn't. But for this dress, it made it unwearable.

To allow for the lacing up the back, the dress has an overlapping panel at the centre back. I had originally secured this with a hook and eye closure on each side. But the closure is now far too tight form me to comfortably wear it.

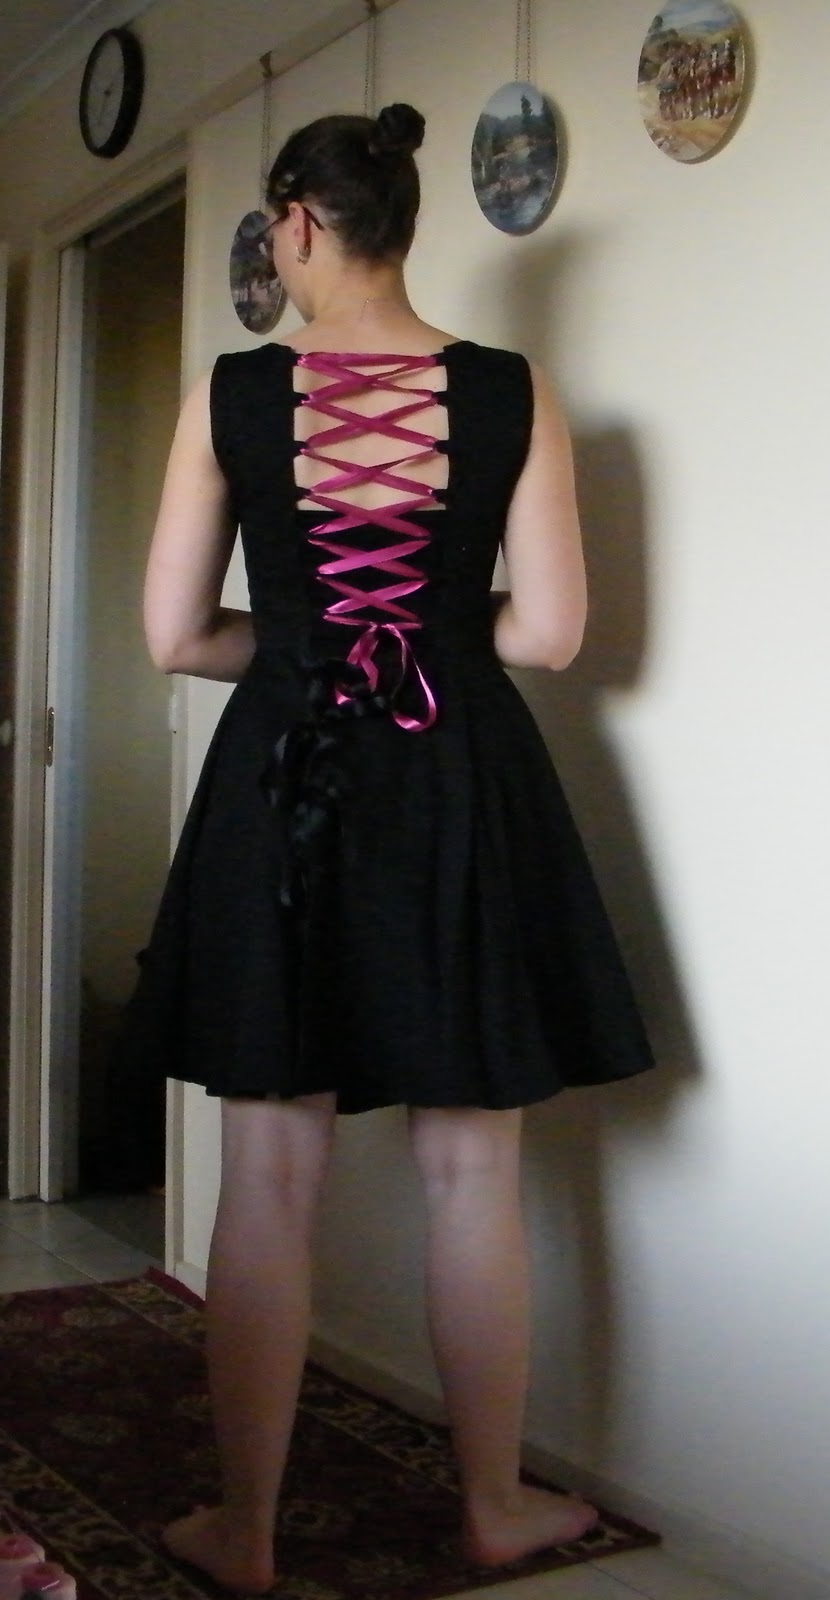
So, I took out the hook and eye closure, and replaced it was pairs of ribbons to tie. One on the inside, and three on the outside. The ribbons give me so much more flexibility in how tightly it sits at the waist, and now it is totally wearable again!


The other thing that needed to be done to finish the dress was to hem the bottom. A lot of my clothes end up unhemmed because I get bored. So, with a hem the dress is finished.

Dress front. Respectable looking.

Dress back. The ribbon is designed to be a surprise after the demure front.
I am wearing a tube top under the dress, because I don't like the look of a visible bra under the lacing, and I'm not comfortable without one. 

Saturday, September 18, 2010

Sewing Basket Challenge 3: Loosening the Bound Sleeves of a Knit Top

Along with the retro fabric top, I also have a top (bought at the same time, and also not tried on before I purchased it) that fits well, except it is too tight around the arms.


To fix this problem, I planned to remove the original binding, and replace it with looser binding (I assumed that the problem was that the binding was just too tight). However, when I started to take the binding off, I discovered that the problem was actually that the sleeves were gathered underneath the binding, not that the binding was too small.


Once I had dealt with this discovery (by unpicking the offending gathers), discovered that the existing binding was actually a good size, I simply pinned in back in place.


Now, all I had to do was to sew the binding in place. My sewing machine is a bit... temperamental... or old, depending on the mood I'm in, so the stretch stitch is a bit unpredictable, and often doesn't stretch. So I opted to use a narrow short zig zag stitch instead (length 1.5, width 1.5). To sew the binding onto my new and improved and bigger sleeve holes, I had to stretch the binding to match the fabric in the sleeve.


And with that completed, my top is now wearable again.

Sewing Basket Challenge 2: Shirring an Ill-fitting Knit Top

While I was in England, I bought several long tunic tops. They were cheap, so I didn't try them on. As a result several of them didn't fit quite the way I'd want.

One of them, I love the fabric, but the fit was too loose. I never wore it, because it made me look a bit pregnant. But isn't the fabric awesome and retro?

So, I have been meaning to fix the fit for a while. My sewing basket challenge seemed the perfect time.

I looked up a number of different shirring tutorials, like the ones from ~Ruffles and Stuff~, Pretty Ditty, and Your Fabric Place.

I have never shirred before. I've never really had a reason to shirr before, but the overly loose retro top seemed the perfect place to start. I read the tutorials, and started.

Now, I was going to be dedicated and draw lines on the top, but decided that it was far too much effort and work, and really just too hard to mark the top - mainly because the hemline is not straight, so I couldn't just mark the lines using a ruler.  (This is why the picture above has a ruler, tailor's wheel and tracing paper in it).

So, I decided to use the previous line of stitching as the guide. Taking the advise of the tutorials, I wound my bobbin my hand, and then loaded it in my bobbin case. At first, I threaded the elastic through the tension plates, but it got stuck. So, I loaded the bobbin without sending the elastic though the tension plates.

I began my first row of stitches by following the existing hem line. I didn't back stitch at the beginning of the seam. As I returned to the start of the seam, I angled the seam, so that I could continue in a spiral around the shirt. I left about 2 mm between the side of the presser foot and the previous line of stitching. I kept going round and round until the bobbin ran out of thread.

As I added more rows of stitching, the top became more and more gathered. Because of this, I stretched the fabric, so that it was flat.

When the bobbin ran out of thread, I simply re wound it, and kept sewing. I repeated this process until I got to my bust line. At my bust line, or the point where you would put an empire seam, I stopped sewing.

The gathers stop at the empire line, just below my bust - you can see the end of the gathers in the lighter fabric.


Because the bobbin was hand woven, the tension was not even, so the thread broke a few times while I was sewing. I threaded the loose (broken) threads, and took them to the wrong (inside) of the top. I then caught the thread with a few stitches, and wove the loose end along the line of stitching for about two (2) inches or five (5) centimetres.

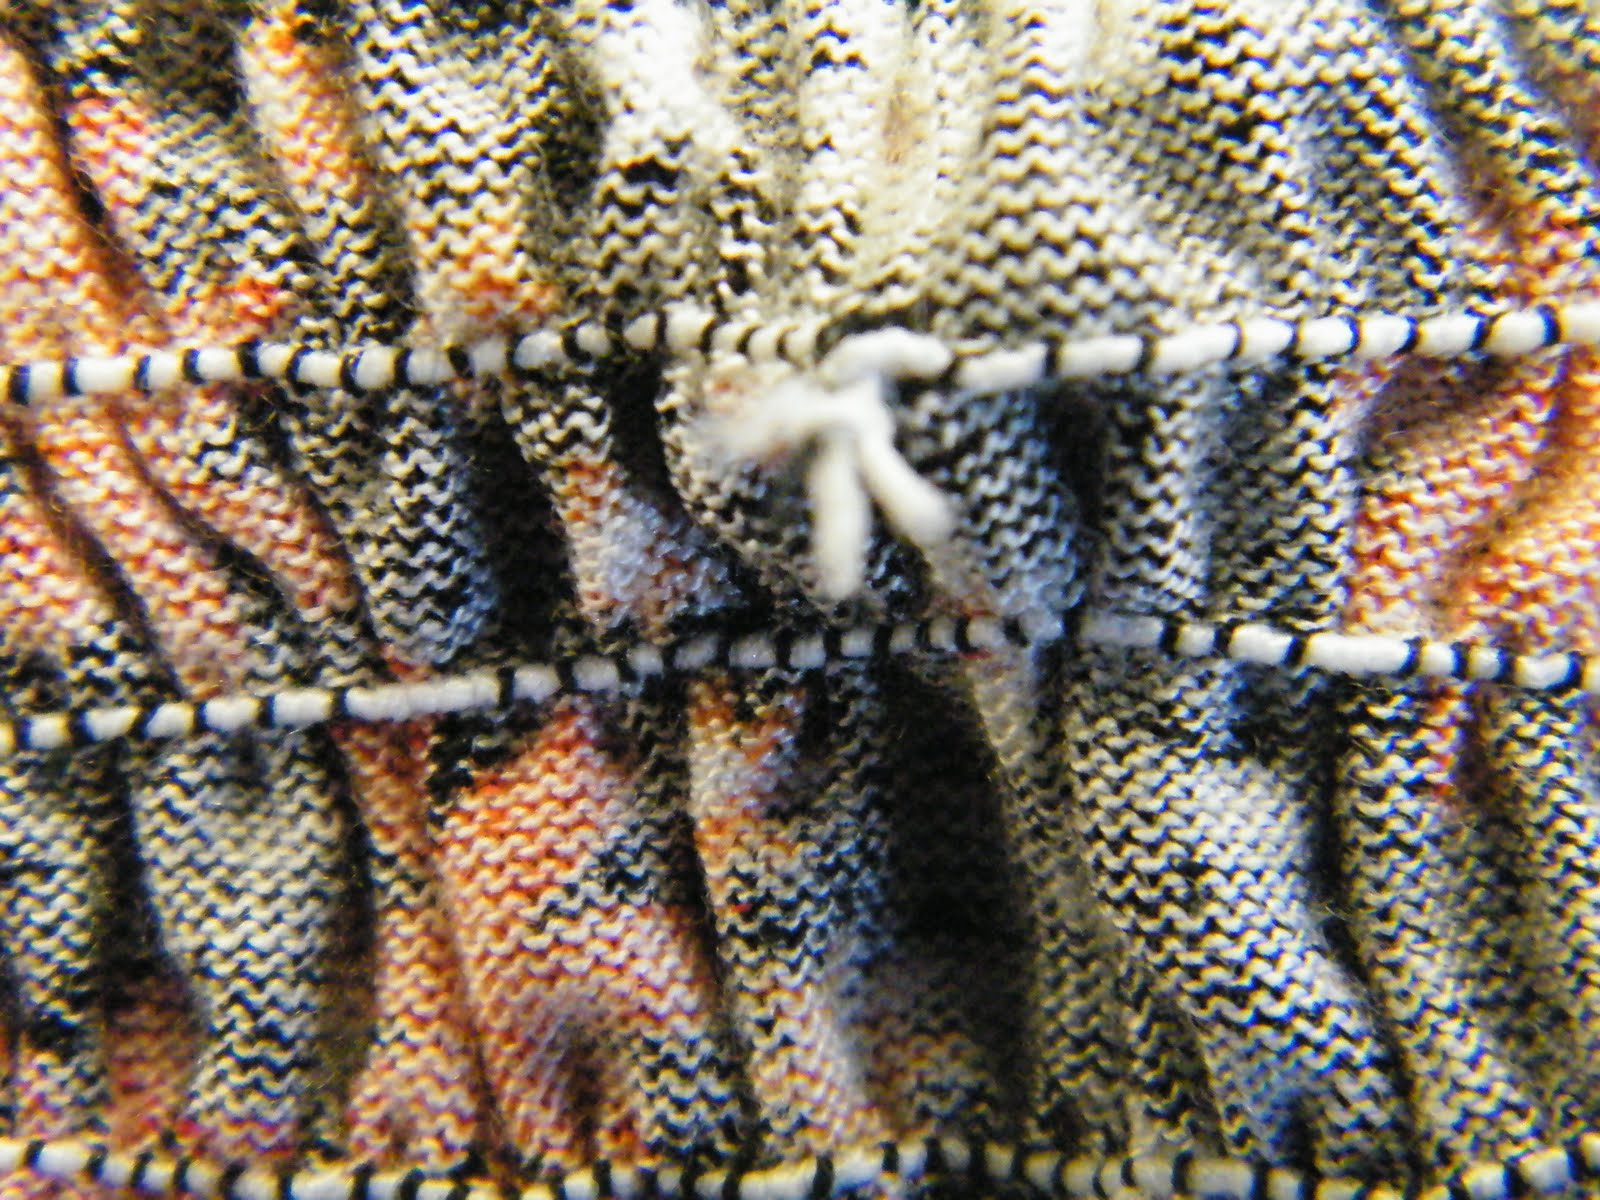
Lastly, I pulled the treads at the beginning and end of each piece of elastic through to the inside of the top, and tied the two ends of the threads, and the two ends of the elastic in a knot against the fabric, and cut off the loose ends.


Because I cheated and didn't draw any guide lines onto the top, my lines of shirring weren't perfect. They weren't totally parallel, but in the end, that doesn't really matter. The top looks like it is even.


And, there, TA-DA! My non-wearable top is now wearable.

Monday, September 13, 2010

Sewing Basket Challenge 1: Backing a Kilim - Polish Tapestry


In 2008, my parents visited Poland, and came home with a kilim - a polish tapestry, usually displayed as a wall hanging. This kilim, however, wasn't backed, so they couldn't hang it. The task was handed to me, and I started it - I got fabric to do he backing, and thread, and washed and overlocked the piece of fabric. I even began the process by catching the tassels at the top of the kilim, but I got stuck there. The kilim was placed in a bag with the backing fabric, and has been languishing in my sewing basket ever since.

Until now. With my sewing group resolution, I am attempting to finish everything in my sewing basket. The kilim now represents the first of my unfinished projects.

So, how did I go about backing the kilim?

Well, as I said, I had already caught the top tassels. I used a blanket stitch to do this, folding the tasel down so it sat invisibly behind the knots.
View from the front of sewed down tassels
View from the back of sewed down tassels

I left the bottom tassels hanging free.


Next, I went to the backing fabric. I had already overlocked the the edges, although this step is slightly unnecessary, as all the edges will eventually be turned to the inside.

To hang the kilim, a rod pocket is required. to do this, I firstly folded the sides in, so that they sat 1 cm narrower on each side than the kilim. The rod pocket was going to be about 5cm deep, so I sewed the side flaps down 10cm. This means that when the rod gets threaded into the pocket, it won't catch on the folded in sides. I used a small whip stitch to secure the sides. This gave me a row of tiny parallel stitches on the right side, and a row of tiny parallel angled stitches on the wrong side.

Small stitches visible on the right side of the fabric
Small whip stitches on the wrong side of the fabric

Next, I folded the rod pocket down and pinned it in place. I used a back stitch to secure this seam, with a small stitch on the right side and a longer stitch on the wrong side. To give this seam additional strength, I sewed a second seam about 8mm above the first. I should note here that I am fairly bad at sewing straight seams, so both seams were a little wonky.

Double row of stitching on the right and wrong sides of the fabric

Next, I had to secure the rod pocket to the kilim. I firstly folded the rod pocket so that the top crease sat flush with the seam. This meant that when folded down, the rod pocket would be invisible behind the kilim when it was hanging. I then pinned the rod pocket to the kilim. The top of my folded seam was flush with the top of the kilim, and the backing fabric was folded back. This allowed me to work on the back of the rod pocket, and the kilim.

I again used a whip stitch, this time slightly longer. Ensuring I didn't go through to the front of the kilim, I would catch one thread of the kilim, then  go through the rod pocket.

Ladder stitch to secure the rod pocket to the kilim
Ladder stitch to secure the rod pocket to the kilim,
The rod pocket secured, I flipped the fabric back onto the kilim, and folded the edges in, so that the backing fabric sat about 1cm from the edge of the kilim on the sides, and flush with the end of the thick wool threads at the bottom.

Pin the backing fabric to the kilim, leaving a border so the backing is not visible from the front.
I sewed the sides and bottom in place using a combination of ladder stitch on the sides, and whip stitch on the base.

And now, my parents have a backed, hangable kilim. Once it is hung, I will post a photo of it.

Friday, September 3, 2010

My Goal - to complete every unfinished project in my sewing bag

With the start of our sewing group, I have set myself a new goal:

To finish all those projects that I'm part way through.

I'm hopeless at finishing things. I have skirts with no waist bands, or things that are unhemmed, or things I always meant to alter, and just never got around to. 

For most of the last year, I've used the excuse that I was working on my thesis, and couldn't possibly take the few hours needed to finish the projects in my sewing bag. But, now that I have graduated, I no longer have that excuse.

My aim is to complete one project every week (lets see how I go!).


 I shall call it:


The Sewing Basket Challenge!

Project One: Backing my parent's Kilim.