Showing posts with label Christmas. Show all posts

Wednesday, December 21, 2011

Some Gifts - necklaces

Whenever possible, I like to give handmade gifts. I like the way that they are more personal, and that I often don't end up spending as much (financially) on them, although I do invest more time in them. As many others have, I have discovered a love of pinterest, and have pinned many many many things. One of my boards is dedicated to gift ideas, and pinned there is this:


Cute, isn't it?

Using that as my starting point, I scoured my stash. I came up with lace and other ribbon like items, but fewer of the pearl like beads that I  was drawn to in the inspiration necklace. So, I visited my local dollar store and came home with fifteen dollars worth of beads (and I still have a lot of beads left), and made the following necklaces:

DSCF4501

DSCF4500

DSCF4498

DSCF4495

DSCF4492

DSCF4489


DSCF4508

DSCF4506

Friday, May 27, 2011

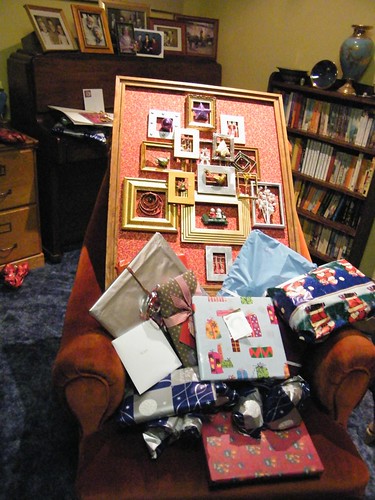
Christmas tree frame and two birds

It seems that I've had this post sitting unpublished for a while... for five months to be exact. These were two of the Christmas gifts I made last year.

Christmas Tree Frame

When I went and took out private health insurance (I wear glasses, which mean regualr visits to an optometrist, and have a back injury which means semi-regular visits to an osteopath, so it's kinda a no brainer for me to take it out, but, luckily, in Australia, it isn't compulsory, and I can still get medical treatment without it) I was inspired by something hanging in the shop window across from my health insurer. Because it took like over an hour to actually take out isurance, beucase the girl didn't seem to know what she was doing, or was having a bad day, or something, so I had a lot of time to stare out the window. That day was one of the few that I didn't have my camera on me, so sadly I don't have a picutre of the original inspiration.

But, the shop across the way was a framing place, and had frames of varying sizes aranged and hung to form a Christmas Tree shape.

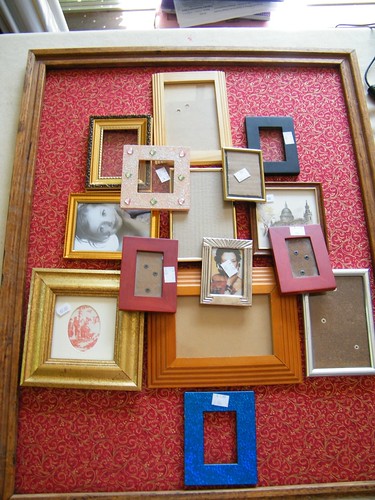
So, taking that as my inspiration, I found a bunch of small frames at thrift stores and dollar shops (you can still see the price stickers on some of them):


painted them:


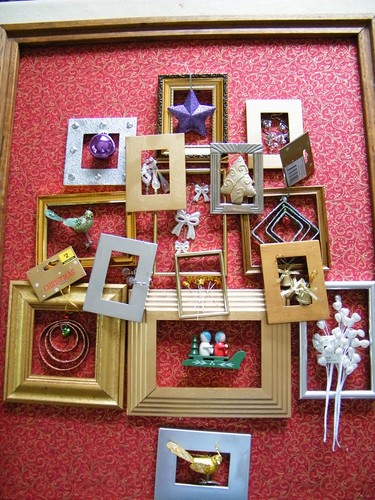
and hung small ornaments from them:


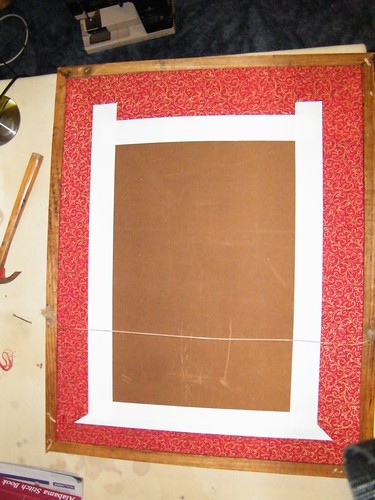
Then, using a large frame from a thrift store, I backed the whole thing with a red and gold Christmas fabric, and super glued the whole lot in place. I stretched the fabric nice and tight by taping it to the back of the board, and glued this to the frame.


I used LOTS of super glue on this project, but hot glue would possibly have worked better for some of it.


TWO BIRDS FRAME

Onec I had finished the Christmas Tree frame, I had a decent number of frames and ornaments left over, and a few people to still make presents for. So, for some of our family friends who spend every Christmas Eve with us, I made the two birds frame.

Monday, May 9, 2011

The T Family Gifts.

One of my best friends lives in Canada, over the other side of the world from where I live in Australia. I stayed with her and her family when I visited Canada in 2008, and now I like to send gifts to them each holiday season. In keeping with my theme for last year, I was trying to make hand made gifts for her and her family. Because of shipping times, this means that really, I should have finished all of the gifts in early November to get there in time for the holiday seasons. But, this year for one reason and another, I got super busy, and actually didn't manage to finish these gifts until last weekend. Yes, in April for all of you playing along at home. Now before you go "oh my god, could you be any later," I have to confess that they aren't actually Christmas gifts, they are Hanukah gifts. And Hanukah was in early December last year. The gifts were all cut, and in various stages of started, just none of them were complete.

Sigh.

But, with the arrival of a brand new, baby T a few weeks ago, I got a second wind for these gifts, and managed to finish them all. I'm posting them on Tuesday.

So, Jenny, if you are reading this, please stop now, so that in a few weeks, you get a nice surprise :)


For the first time ever, I included labels on everything I made. These labels aren’t perfect, but I like the effect they gave on each of the gifts. I used an orange fabric pen on calico to create labels like this one:


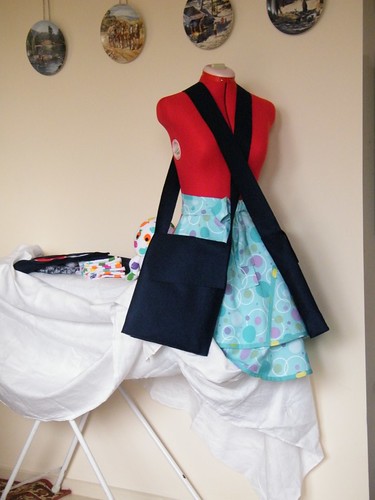
As I finished each project, I would put it on the ironing board. By the time I was completely finished, my ironing board looked like this. I just love this shot.


J's Sketch notebook bag.

I had originally planned to make a journal cover similar to the ones here. I had a gorgeous purple wool chosen, and a button, but I got sidetracked. And then I saw this bag pattern at vivatveritas from guest blogger nette, and I knew that I had to make that instead. I still wanted to incorporate the idea of an sketch book, I added a pocket on the inside of the bag, just big enough to slip an A5 sketch book into.

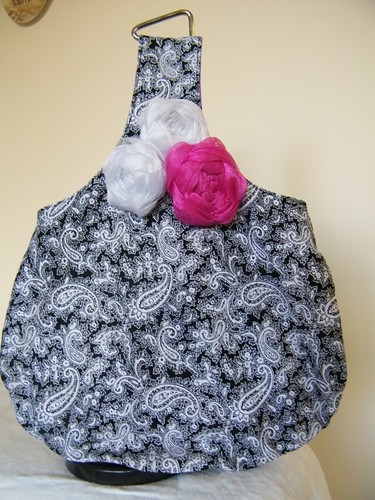
The bag is made from black and white paisley cotton (I love the fabric, and could never bring myself to part with this remnant, so this was a perfect way to use the remnant), lined with a purple polycotton, and decorated with three fabric flowers, made from glittery crystal organza. I put my label on the inside, behind the pocket.


K and A’s gifts.


Sketch book messenger bag.


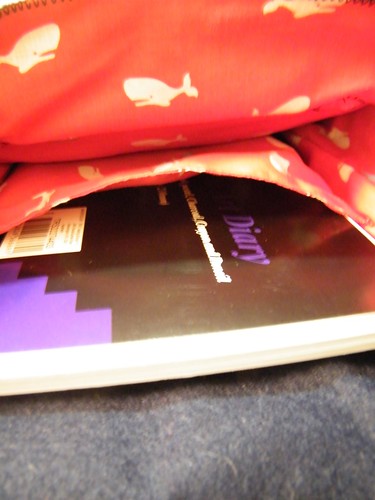
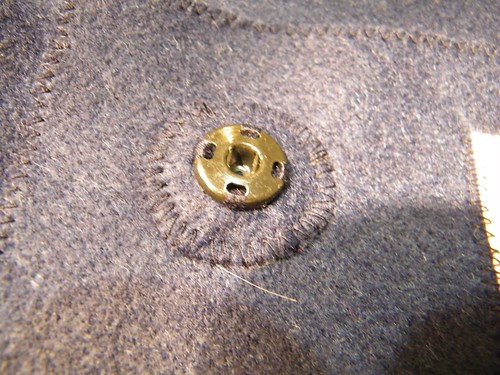
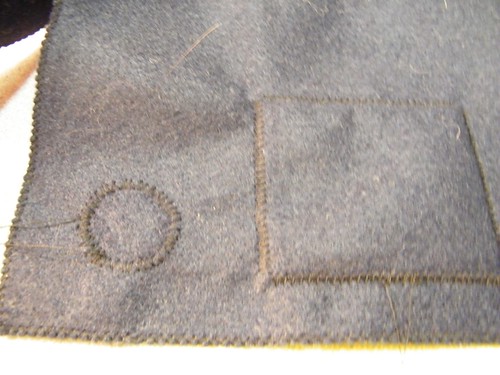
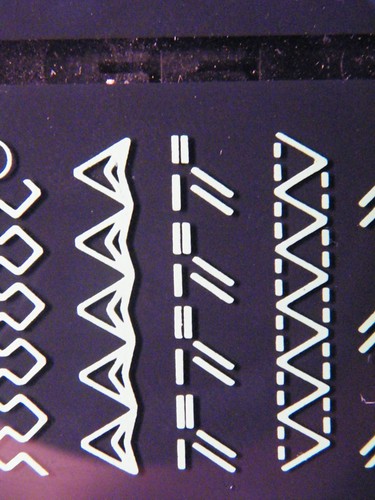
I had originally planned, and cut and started sewing, a journal cover similar to the one here, but I just wasn’t feeling it. I still wanted to give the sketch book. I remembered seeing a tutorial for a messenger bag here at mmmcrafts, so using that as a base, I made a navy blue felt messenger bag, lined with red whale fabric, with an internal pocket to hold the sketch book. I used press studs to close the flap, hand sewn to a double layer of felt, and then zig-zag stitched to the bag. I sewed my label to the inside of the front flap, and was really pleased with the effect on the front of the flap.


Although not part of the T Family, A is another one of my good friends, who happens to live in England. I try to send him a holiday gift every year. He also got a felt messenger bag.


R&D


I was at a bit of a loss for what to do for R&D until I saw this table runner at moda bakeshop. Using that as my inspiration, I created a felt backed circles table runner. The fabrics are a combination of things I had in my stash and things that were in my scraps bag. I used a gold embroidery thread to sew everything down.


C&L


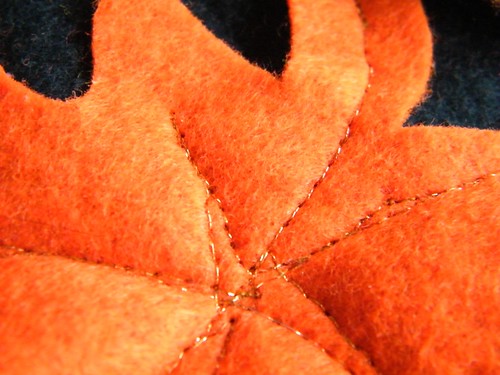
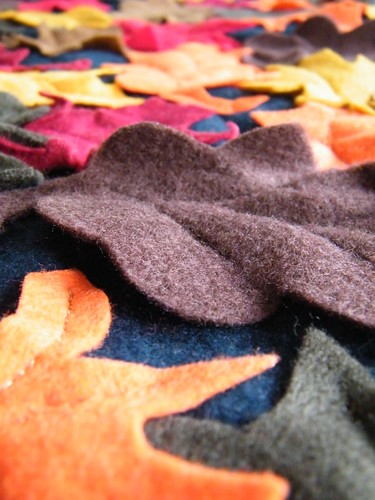
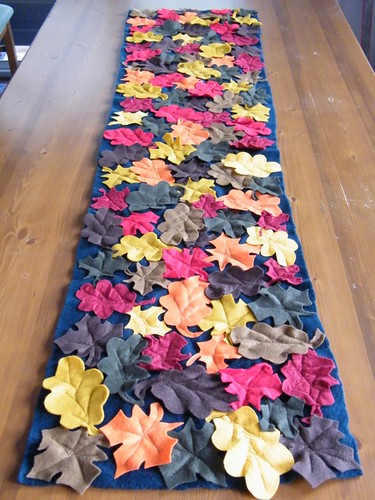
When I saw this project on craftgossip, I just knew I had to make it. Again, I used the original instructions from Fawnda from firefliesandjellybeans  more as inspiration than anything else. I sewed each leaf to the polar fleece backing by stitching the veins using gold thread.


Baby T


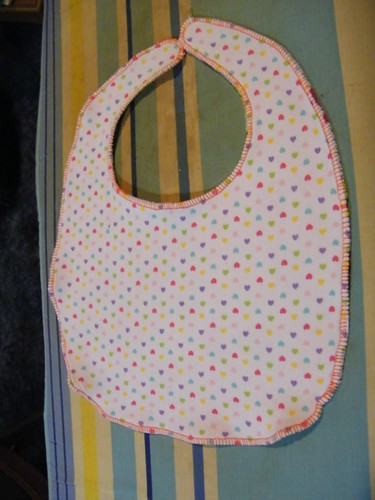
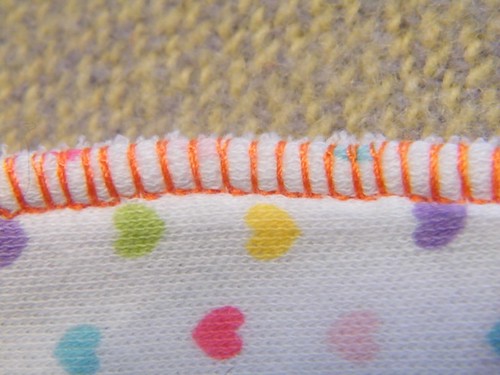
I didn’t know the sex of the baby, (I’m not sure if R&D didn’t know, or if they just didn’t post it on facebook), but it meant that I had to make a nice, gender neutral gift. In the end, I went with two things. The first is more practical, 4 terry towelling bib. I used the pattern here from liaspace. The second gift was more fun, a stuffed octopus toy using the pattern here for oppsie the octopus on moda bakeshop.


J's Birthday


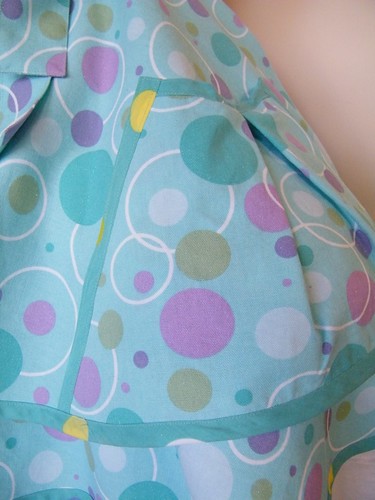
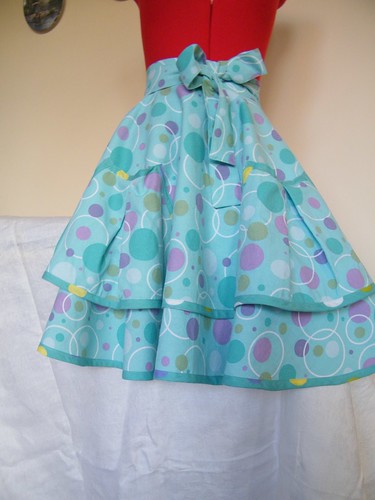
The last gift in the parcel was a birthday gift. Again, I was inspired when craftgossip posted a link here for a free pattern download from bramcost publications for this awesome 1953 party apron which now isn’t free, but is only $3.99, I knew it was perfect for J. And really, who doesn’t need a fun, flirty, 1950s apron?


So, happy holidays T family!

Sunday, January 16, 2011

Christmas Napkins

Every year, my family has a large Christmas dinner on Christmas eve. It's part of my dad's Polish heritage, and it always means Christmas to me.

As a result, we have at least 14 (usually more) friends and family to dinner. This year, we had sixteen. We cook huge amounts of food, and eat far too much. There is wine, and conversation, and it's always been one of my favourite nights of the year. It's as much about family as it is anything else. The celebration is traditionally a dinner that keeps vigil before midnight mass, but that isn't part of the tradition that we have ever followed.

This year, as part of our celebrations, I made napkins.

I got inspired by this post and  instructional pdf by craft sanity, which I originally found via craftgossip.

So, I worked out how much fabric I would need (and massively over estimated it, but hey, next year I have fabric ready to go, right?), found the fabric, and purchased it.

And then it sat in a bag in my room for months. And months.

Then, maybe a month before Christmas, I decided that in fact, I needed to start them, because that was a whole lot of little snips to make to have them sit flat.

I mostly followed the awesome tutorial, but I used a dinner plate for my circle shape. Placing right sides together, I cut both fabrics at the same time. I used a pen to trace around the plate, and then put like 3 pins in to hold the two fabrics in place, before cutting around the circle, about 1.5cm from the line I'd drawn. I then used the line as my stitch guide, and I actually got perfect circles that way.

In the end, I made 44 napkins - I gave 4 to my sister, 8 to my grandmother (with a matching apron for my grandfather), and that left 32 for my family.

You know what?

I didn't even take a photo of them, and now they're all packed up and put away with the rest of the Christmas linens, so I can't even give you a pretty photo of my work.

Sunday, December 26, 2010

Edible Christmas Gifts

As I mentioned in a previous post, I have been trying to be good, and have a totally hand-made, hand-baked, thrifted Christmas. I managed this, with only two little exceptions (more about that in another post). 


For some people, this meant they received thrifted gifts. For others, it meant receiving things I had sewn or crafter. And, for others (those that are the subject of this blog), they received things I had baked.


The first round of baking was cookies and biscuits from the CWA (Country Women's Association) cookbook. These were given to twelve of my friends, each with three or four cookies in a packet. I sadly forgot to take any photos, or, for that matter, write down which recipes I used for these gifts, so that's about all I can say on the matter.


The second round of baking was brownies for my secret santa at work, my team mates, and the people from my dance class. So, 18 gifts all up this time. My brownie recipe makes a LOT of browines, but because I was giving so many gifts, I decided to try a variation of it.


My original Brownies:
I adapted the brownie recipe from a friend’s cookbook, which I think was called home food. 


250g butter (I use unsalted)
500g - 600g eating chocolate (I prefer using dark chocolate) (eating chocolate is better quality that cooking chocolate, for about the same price. I figure, why use lesser quality ingredients?)
1 Cup cocoa powder
2 Cups sugar
1 1/2 Cups Plain flour
1 1/2 teaspoon baking powder
6 eggs
1 packet chocolate chips (again, I usually use dark chocolate chips)
*Melt butter and chocolate. 
*Stir in cocoa and sugar. 
*Stir in plain flour and baking powder. 
*Mix in eggs.
*Mix in chocolate chips. 
*Divide mixture into two dishes, if not silicon, line with aluminium foil or baking paper. 
*Bake at 180C / 350C until knife comes out clean. Remember that there are chocolate chips, so this might be a bit tricky, but I have served these slightly undercooked, and because of how much chocolate is in them, they solidify a little as they cool.


My White Chocolate and Macadamia Brownies:

250g butter (I use unsalted)
500g - 600g white eating chocolate 
2 Cups sugar
1 1/2 Cups Plain flour
1 1/2 teaspoon baking powder
6 eggs
1 packet white chocolate chips
1 packet macadamia nuts.
*Melt butter and chocolate. 
*Stir in sugar. 
*Stir in plain flour and baking powder. 
*Mix in eggs.
*Mix in macadamia nuts and chocolate chips. 
*Divide mixture into two dishes, if not silicon, line with aluminium foil or baking paper. 
*Bake at 180C / 350C until knife comes out clean. 

Because I was giving these as gifts, rather than baking in the usual square silicon containers, I used the fairly sizeable collection of silicon cup cake shapes we have. This gave me brownie bites, which hold together better than if I had just cut up a larger portion.

I had found six huge huge wine glasses at an opshop, so I decided to use two of them as presentation of the brownies for my secret santa. I figured that even if he didn't like brownies, he would like large wine glasses what 21 year old male doesn't?)

To present, I filled both glasses with brownie bites, then cut slits in the middle of sheets of cellophane. I slipped the stem of the wine glass through the slit, so that the glass was covered with cellophane when I tied a ribbon around it.

They ended up looking like this:


It wasn't until after I had given them away that I realised that taking photos of green things against a green leafy background is perhaps not the most sensible idea. Ah well, I know for next time.

Next I wrapped up the brownies bites for everyone else. This was a bit easier, because I wasn't wrapping wine glasses, but the fact that I was wrapping 18 of them made it a bit tricky. Partly because I didn't know how many each person was going to end up getting.

So, what I did was lay the cellophane out in rows on the kitchen table. That way, I could just go along the rows adding a brownie to each pile until I was done. I ended up giving each person four brownie bites.

Next, I simply gathered the cellophane up and tied it with curling ribbon. Which I didn't curl.


They looked pretty awesome when they were all together in the boxes.

And, they went down really well :). I was very pleased with the response to them. I hadn't made the which chocolate versions before, but the general consensus was that they were totally edible, and that people would happily eat them again.

The other thing I made as Christmas gifts were fruit mince pies. I normally make about 12 dozen in any given year, and so far this year, I have made 12 1/2 dozen. So, right on target. I might end up making another dozen or two, to take on holidays with me.

The recipe I use isn't mine, it's my mother's. I took over making them when I was about 15, and now they are part of my Christmas routine (the other is making mushroom filled pierogi, an integral part of our Christmas celebrations).

I went overseas a few years back, and wasn't around for Christmas, so mum sent me her recipe. I have simply copied exactly what she sent to me:


FRUIT MINCE PIES 
My mother always says, when offering guests fruit mince pies, that that you get a lucky month every time you eat a mince pie at a different person’s house ie if you visit 12 houses and have a mince pie at each, you will be lucky for the entire year.
PASTRY
1 cup plain flour
1 cup self-raising flour
½ cup cornflour (proper corn cornflour, not wheat cornflour)
¼ cup icing sugar
¼ cup custard powder
250 gram butter
¼ cup iced water, approximately

  1. sift dry ingredients into basin
  2. rub butter in evenly (I use a pastry cutter to cut the butter into the dry ingredients, then finish off with my hands)
  3. add enough water to make ingredients just cling together
  4. knead lightly until smooth (recipe says to do this on a floured surface, but I don’t use flour)
  5. divide pastry into 4 balls
  6. wrap in plastic food wrap and refrigerate for 20 minutes or more
  7. roll pastry – if it has been in the fridge for a while, it will be solid, but it will gradually roll out, and it is actually more workable this way than if it is sticky and soft because it is too warm. 
FRUIT MINCE
ORIGINAL RECIPE:
125 gram beef suet
250 g (1 1/3 cups) seedless raisins, chopped
125g (2/3 cup) currants
60g (1/2 cup) chopped almonds
30g (1/3 cup) chopped mixed peel
45g (1/4 cup) chopped dried figs
30g (1/4 cup) chopped dried apricots
30g (1/4 cup) chopped dates
2 medium apples, peeled, cored and grated
125g (1/2 cup) sugar
½ teaspoon ground nutmeg
½ teaspoon ground mixed spice
½ teaspoon ground cinnamon
½ teaspoon ground cloves
300 mls (1 ¼ cups) brandy
125 mls (1/2 cup) medium sherry
separate beef suet from tissues and chop finely in a food processor or with a French knife dipped in flour (butcher may do this).  Place all ingredients in a mixing bowl and stir together with a wooden spoon until all are moist.  Cover bowl with a plate or tea towel (not plastic wrap) and store in a cool dry place for 2 weeks, checking every five days and add 3 tablespoons extra brandy or sherry if fruit has absorbed all liquid.   Pack into clean stoneware or glass jars, cover surface with a circle of waxed paper, then cover securely with cellophane paper or tops of jars.
WOJTASISED RECIPE
Start out with double quantities:
1 kilo pack of mixed fruit (avoiding the type with glace cherries because I hate glace fruit)
4 medium apples, peeled, cored and grated
Add (quatity varies according to what is available and how much gets eaten whilst making fruit mince):
1 or 2 packets of almonds (could be 125g packet but who reads labels)
Wheel of dried figs
Packet of dried apricots (again, who reads labels)
Dates optional because they’re not my favourite commodity
Mince all of the above in a mincer (I have never tried a food processor, but suspect it would have to be watched carefully to ensure that the fruit mince remains in small bits rather than homogenous mush)
Transfer to a large mixing bowl and add the following:
250g (1 cup) sugar
1 teaspoon ground nutmeg
1 teaspoon ground mixed spice
1 teaspoon ground cinnamon
1 teaspoon ground cloves
Add some brandy and sherry while restraining Chris (my father) from going overboard on soaking the mince in grog. Use mince immediately for the first batch of pies (because everything has been left until the last minute as usual).  Cover bowl with plastic wrap and store remainder in fridge, using as needed for more mince pies.
The fruit mince pie tins I use have a fairly shallow, round mould, so that the pies have a round base without sides, and I like a pastry star on top, rather than a lid.  
We usually make two types of pies: the ones with fruit mince we made that year, and stronger ones with fruit mince we made the year before. Now, before you freak out, remember that our version has NO MEAT in it. None. It's mostly dried fruit and alcohol. So, we put a decent amount in a sealable jar, add a few inches of brandy or sherry on top, and put it in the back of the fridge for a year. These pies really are quite alcoholic - I'm pretty sure that there is too much alcohol to disappear totally when they are baked.
This year, my great-aunt was coming to our Christmas celebrations, and she is gluten-intollerant. So, in addition to the normal pastry, I also made gluten free pastry. I used a pizza and pastry gluten free mix, and followed the recipe on the packet for short crust pastry. They turned out very well, if I do say so myself.
My gluten-free-great-aunt was given some fruit mince pies for Christmas, as was my secret santa. (My extended family is quite large, and we instigated a secret santa for part of the family this year. It worked quite well, amazingly).