Monday, May 9, 2011

The T Family Gifts.

One of my best friends lives in Canada, over the other side of the world from where I live in Australia. I stayed with her and her family when I visited Canada in 2008, and now I like to send gifts to them each holiday season. In keeping with my theme for last year, I was trying to make hand made gifts for her and her family. Because of shipping times, this means that really, I should have finished all of the gifts in early November to get there in time for the holiday seasons. But, this year for one reason and another, I got super busy, and actually didn't manage to finish these gifts until last weekend. Yes, in April for all of you playing along at home. Now before you go "oh my god, could you be any later," I have to confess that they aren't actually Christmas gifts, they are Hanukah gifts. And Hanukah was in early December last year. The gifts were all cut, and in various stages of started, just none of them were complete.

Sigh.

But, with the arrival of a brand new, baby T a few weeks ago, I got a second wind for these gifts, and managed to finish them all. I'm posting them on Tuesday.

So, Jenny, if you are reading this, please stop now, so that in a few weeks, you get a nice surprise :)


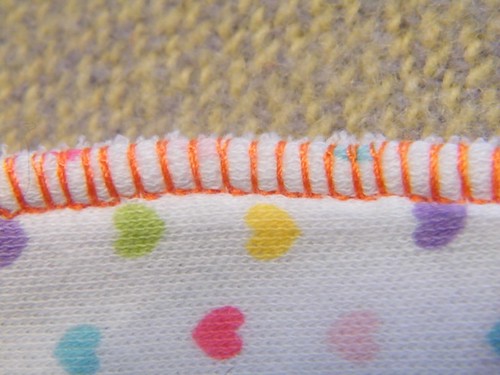
For the first time ever, I included labels on everything I made. These labels aren’t perfect, but I like the effect they gave on each of the gifts. I used an orange fabric pen on calico to create labels like this one:


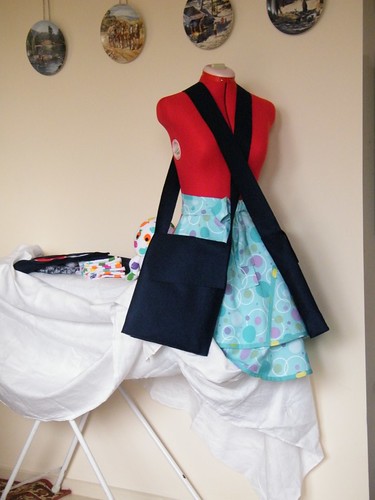
As I finished each project, I would put it on the ironing board. By the time I was completely finished, my ironing board looked like this. I just love this shot.


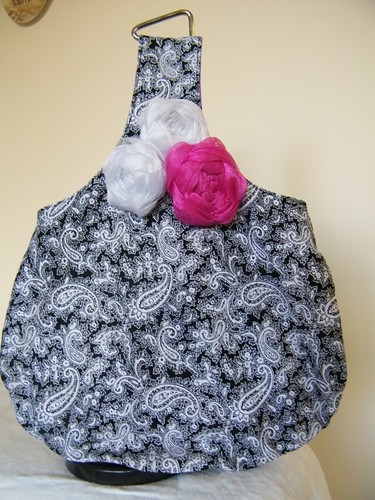
J's Sketch notebook bag.

I had originally planned to make a journal cover similar to the ones here. I had a gorgeous purple wool chosen, and a button, but I got sidetracked. And then I saw this bag pattern at vivatveritas from guest blogger nette, and I knew that I had to make that instead. I still wanted to incorporate the idea of an sketch book, I added a pocket on the inside of the bag, just big enough to slip an A5 sketch book into.

The bag is made from black and white paisley cotton (I love the fabric, and could never bring myself to part with this remnant, so this was a perfect way to use the remnant), lined with a purple polycotton, and decorated with three fabric flowers, made from glittery crystal organza. I put my label on the inside, behind the pocket.



K and A’s gifts.


Sketch book messenger bag.


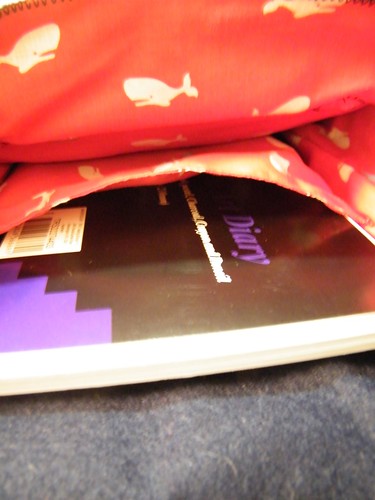
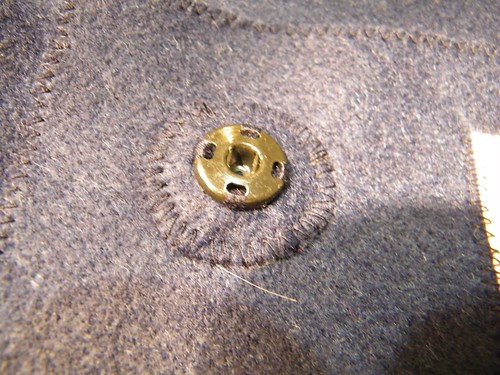
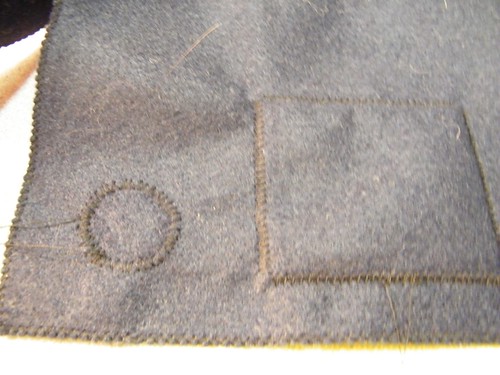
I had originally planned, and cut and started sewing, a journal cover similar to the one here, but I just wasn’t feeling it. I still wanted to give the sketch book. I remembered seeing a tutorial for a messenger bag here at mmmcrafts, so using that as a base, I made a navy blue felt messenger bag, lined with red whale fabric, with an internal pocket to hold the sketch book. I used press studs to close the flap, hand sewn to a double layer of felt, and then zig-zag stitched to the bag. I sewed my label to the inside of the front flap, and was really pleased with the effect on the front of the flap.


Although not part of the T Family, A is another one of my good friends, who happens to live in England. I try to send him a holiday gift every year. He also got a felt messenger bag.
R&D


I was at a bit of a loss for what to do for R&D until I saw this table runner at moda bakeshop. Using that as my inspiration, I created a felt backed circles table runner. The fabrics are a combination of things I had in my stash and things that were in my scraps bag. I used a gold embroidery thread to sew everything down.


C&L


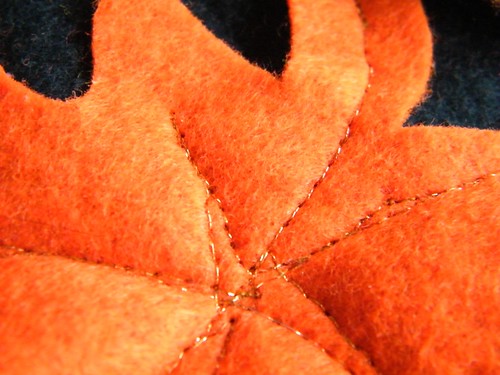
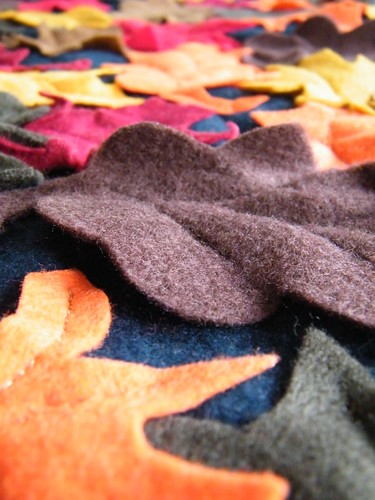
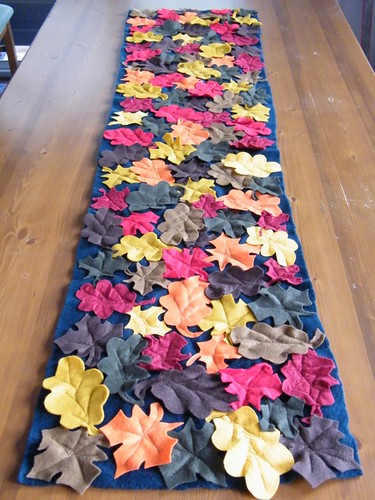
When I saw this project on craftgossip, I just knew I had to make it. Again, I used the original instructions from Fawnda from firefliesandjellybeans  more as inspiration than anything else. I sewed each leaf to the polar fleece backing by stitching the veins using gold thread.

Baby T


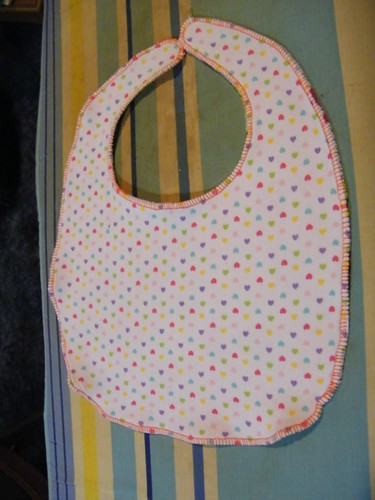
I didn’t know the sex of the baby, (I’m not sure if R&D didn’t know, or if they just didn’t post it on facebook), but it meant that I had to make a nice, gender neutral gift. In the end, I went with two things. The first is more practical, 4 terry towelling bib. I used the pattern here from liaspace. The second gift was more fun, a stuffed octopus toy using the pattern here for oppsie the octopus on moda bakeshop.

J's Birthday


The last gift in the parcel was a birthday gift. Again, I was inspired when craftgossip posted a link here for a free pattern download from bramcost publications for this awesome 1953 party apron which now isn’t free, but is only $3.99, I knew it was perfect for J. And really, who doesn’t need a fun, flirty, 1950s apron?
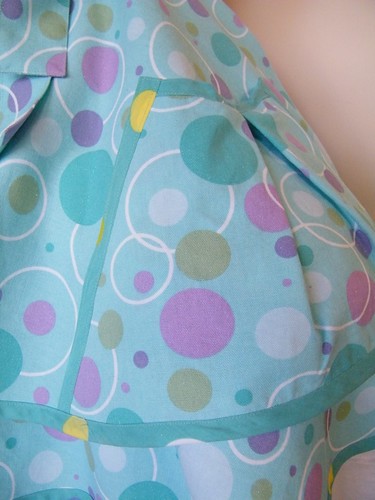
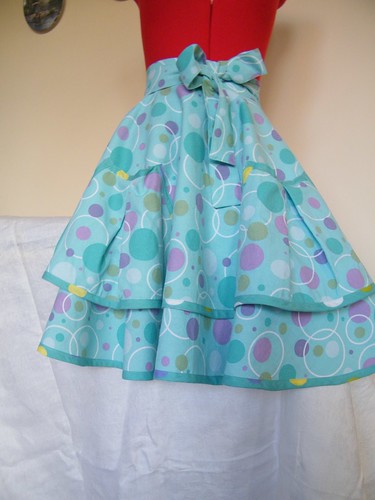


So, happy holidays T family!

Sunday, May 8, 2011

Taking Stock - week 2

Finished Projects 2011

* Autumn leaf table runner                                                  Gifts (Tarof Family)
* Purple tea-with-the-debutants dress                                   Work Clothing
* Ruffle dress                                                                       Work Clothing
* Olive dress                                                                         Work Clothing
* Maroon Skirt                                                                      Work Clothing
* White damask skirt                                                             Work Clothing
* White Damask blazer                                                         Work Clothing
* Magenta stretch dress                                                         Work Clothing
* Green stretch dress                                                             Work Clothing
* Apron for Nerilee                                                               Gifts
* Apron for Robyn                                                                Gifts
* Oopsie the Octopus                                                             Gifts (Tarof Family)
* Circles Table Runner                                                          Gifts (Tarof Family)
* A5 art book bag                                                                  Gifts (Tarof Family)


What I accomplished this week (Friday to Thursday)

* 1950s Apron                                                                        Gifts (Tarof Family)
* 4 x Baby bibs                                                                      Gifts (Tarof Family)
* Kyles’ art book cover                                                          Gifts (Tarof Family)
* Adam’s art book cover                                                        Christmas 2010

Projects on the go

* Pleated skirt with teal and black design                              Work Clothing
* Blazer with teal and black design                                       Work Clothing
* 1 (or is it 2?) x cushions                                                       House Stuff

Future Projects with fabric already purchased

* 52 weeks of quilt blocks quilt                                              Christmas 2011
* 2 x Blue cushions                                                                House Stuff
* Black damask dress                                                             Work Clothing
* Pink and black damask dress                                               Work Clothing
* Hearts dress (fabric)                                                              Home Clothing
* Hearts dress (quilt cover)                                                      Home Clothing
* Teal dress                                                                             Work Clothing
* Wild west costume                                                                Home Clothing
* Tara top – floral quilting fabric                                              Home Clothing
* Tara dress – pink quilting fabric,                                           Home Clothing
* Ying Yang gathered top                                                        Home / Work Clothing
* Red ruffle skirt                                                                       Home / Work Clothing
* Blue corset with quilting fabric                                              Home Clothing
* Refashion of pink tops from Big W                                       Home Clothing
* Refashion of black patterned dress from Big W                     Home Clothing
* Refashion of purple patterned dresses from Big W                Home Clothing
* Underskirts / petticoats for summer dresses                            Home / Work Clothing
* Hot pink drill dress                                                                Home Clothing
* Hot pink check dress with pleats to create pink waist            Home Clothing

Future Project Ideas

* Shorts for pole                                                                        Home Clothing
* Olive jacket/ coat                                                                    Home / Work Clothing
* Slips to keep me warm under summer dresses                        Home / Work Clothing
* Duro Dress / top                                                                     Home / Work Clothing
* Over-The-Head 1950s reproduction pattern dress                  Home / Work Clothing
* Bag thing to cover and carry my baby sewing machine         Sewing Gadgets

Fabrics in my stash

As I slowly go through my stash, I will keep updating this list. Because honestly, I have no idea what is in my stash at the moment. These are just the things in the box I can get to.

* Purple/red/blue knitted fabric
* Fan fabric
* Striped (white base) terry towelling – polycotton – 1.5m, 150cm wide
* Fish (white base) terry towelling – polycotton – scraps
* White/Cream stretch fabric – 100% cotton – 2m, 150cm wide
* Hearts in straight line (white base) stretch fabric – 100% cotton – 1.5m, 150cm wide
* Hearts (white base) stretch fabric – 100% cotton – 1m, 150cm wide
* Green leaves fabric – 100% cotton – 1m, 115 wide
* Green and white Michael miller dandy damask – 100% cotton – 3 yards, 150cm wide
* Red with blue and white whales fabric – 100% cotton – 1.5m, 150cm wide
* Navy blue acrylic felt – .6m, 80cm wide
* Rose pink stretch drill - Cotton lycra - 4.9m, 150cm wide
* Rose bed sheets
* Black satin bed sheets
* green micheal miller fabric
* japanese leaf fabric
* leaf baby cord

Stash Busting Ideas

* Top with purple/red/blue knitted fabric                                  Home / Work Clothing
* Tara dress with hearts fabric for nightgown?                         Home Clothing

Thursday, May 5, 2011

Ruffle Front Dress.

So, this is another modcloth inspired dress.


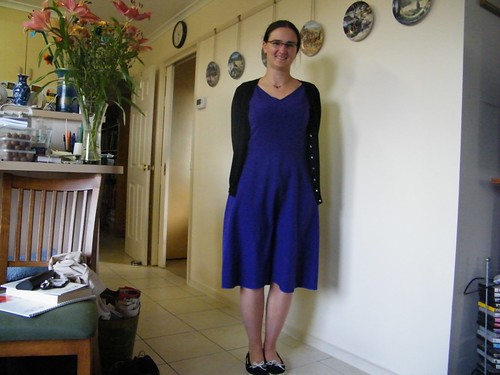
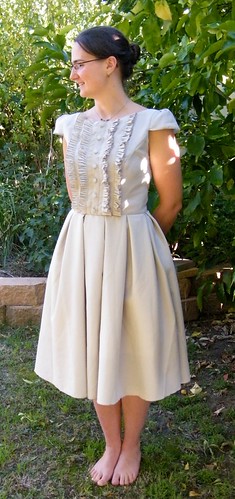
My finished dress:


The inspiration is here:


Source


From that modcloth inspiration, I drew this as my guide to what I was sewing:


Drawing is clearly not my strong point. But it gave me the idea of what I was going to do.

This is actually a really simple alteration. It only required altering one pattern piece: Centre Front Bodice.


Again, like the olive dress, this pattern is based on Butterick 4443. As I’ve said before, it fits, I have made it a bunch of times, and it’s easy. So, once again, I went to my pattern box, and pulled out trusty B4443.


The skirt had already been altered from the original skirt (as seen in the purple crepe dress) to the pleated skirt in the tea-with-the-debutants dress (both can be seen in my post here)


So, all I needed was the ruffle detailing.


I wanted 4 rows of ruffles and one row of buttons.


So taking my centre front piece:


I drew a line parallel to the centre front. This would be where my first row of ruffles sits.


The second row I angled slightly. I did this because I’m not rectangular, and the second, angled row of ruffles followed the princess seam a touch closer this way.


You can see a little mark between the lines at the neck. This is where the second line would have gone if they were evenly spaced, not angled.

I cut the pattern piece out, and cut along my lines


Cutting along each of my lines, I retraced these three pieces, adding a 1.5cm seam allowance. The marks are the 1.5cm seam allowance


And with that, you’re done with the pattern alteration.


I then started on my ruffles. The first (and fairly bad) try was using doubled over fabric and pin tucks.


This didn’t work. At all. It was stiff and bulky, and just didn’t look good.


Looked kinda like what I was going for, but not really right.


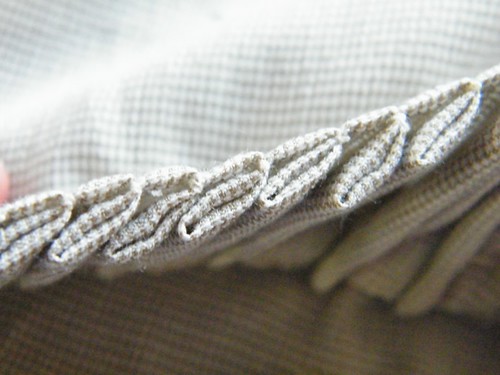
Although, up close and from the side, it makes a cool photograph


So, I tried again. This time, I used a single layer of fabric. I finished one edge with a rolled hem on my overlocker. I then hand pleated each row.


 I was planning to use my fancy new ruffling foot, but I had tidied it up, and wasn’t sure which box it went into, so went the old fashioned-by-hand route instead. So, my pleats aren’t perfectly even, but I like the way they look.


Each of the rows took just under 150cm - the width of the fabric I was using.


I sewed each of these rows of pleats in place. Directing the hems to the centre front, I top stitched each row of ruffles.


Now, with my pieces all sewn together, I essentially had a centre front piece.


From here, I started making up the rest of my dress as normal.


What I should have done was added the fabric strip at the front the buttons would sit on. However, I didn’t, so I made my job a lot harder by having to add the fabric later.

But, what you do is take a strip of fabric 3cm longer than your centre front measurement, and 6cm wide. Press the edges under 1.5 cm. Pin down, and sew (top stitch) in place.

Using a nice long ruler (I love my 1 metre metal ruler), mark the placement of the buttons. Remember that odd numbers are almost always more visually aesthetically pleasing. Because the buttons are not functioning as an opening, you can space them evenly starting with the top and bottom button. If you are using buttons for an opening, you should place the first button at the nipple line, then space the buttons from there. It prevents gaping.


I used a blue fabric pen to mark the button placement.


Now, sew your buttons in place. I used self cover buttons with a shank. I'm not sold on the shank, but I'm pretty sure that I'm the only one who can see the shanks. So it's okay. (Oh, and because I added the strip down the middle after I had basically finished the dress, it looks a bit wonky, as do the buttons)


Give or take, I follow these steps:


* Sew centre front to side front
* Sew centre back to side back
* Sew shoulder seams
* Set in sleeves
* Repeat for lining
* Sew neck lines and arm holes
* Sew turn right side out
* Attach skirt
* Set zipper in left hand side and finish seam
* Sew right hand seam
* Hem
* Top Stitch neck and armholes (if not full sleeves)
* Stitch lining to main fabric
* Sew buttons in place


And, you’re done.


I;m really happy with this one. I love the contras of the crisp pleats and the ruffles and the poofy sleeve caps. And, the fabric (4m from an op-shop for $10) is awesome. It doesn't crease, so I can stuff it in a drawer at work, and pull it out, and it looks great. And, since I ride in and keep a weeks worth of clothing at my desk, that makes me very very happy.

Saturday, April 30, 2011

Taking Stock

I have sort of got my mess of a room under control, so my efforts to become more organised are moving to my sewing.

Specifically, more organised in terms of what I'm doing and accomplishing.

So, in that light, once a week - a Friday or Saturday - I'm going to post a variation of this one. Basically a list of my sewing plans, works in progress, and achievements this year. Taking Stock of what I'm doing and what I've done, what I'm planning and what I'm hoarding.


Finished Projects 2011

* Autumn leaf table runner                                                  Gifts (Tarof Family)
* Purple tea-with-the-debutants dress                                   Work Clothing
* Ruffle dress                                                                       Work Clothing
* Olive dress                                                                         Work Clothing
* Maroon Skirt                                                                      Work Clothing
* White damask skirt                                                             Work Clothing
* White Damask blazer                                                         Work Clothing
* Magenta stretch dress                                                         Work Clothing
* Green stretch dress                                                             Work Clothing
* Apron for Nerilee                                                               Gifts
* Apron for Robyn                                                                Gifts


What I accomplished this week (Friday to Thursday)

* Oopsie the Octopus                                                             Gifts (Tarof Family)
* Circles Table Runner                                                          Gifts (Tarof Family)
* A5 art book bag                                                                  Gifts (Tarof Family)


Projects on the go

* Pleated skirt with teal and black design                              Work Clothing
* Blazer with teal and black design                                       Work Clothing
* 4 x Baby bibs                                                                      Gifts (Tarof Family)
* Kyles’ art book cover                                                          Gifts (Tarof Family)
* Adam’s art book cover                                                        Christmas 2010
* 1 (or is it 2?) x cushions                                                       House Stuff
* 1950s Apron                                                                        Gifts (Tarof Family)


Future Projects with fabric already purchased

* 52 weeks of quilt blocks quilt                                              Christmas 2011
* 2 x Blue cushions                                                                House Stuff
* Black damask dress                                                             Work Clothing
* Pink and black damask dress                                               Work Clothing
* Hearts dress (fabric)                                                              Home Clothing
* Hearts dress (quilt cover)                                                      Home Clothing
* Teal dress                                                                             Work Clothing
* Wild west costume                                                                Home Clothing
* Tara top – floral quilting fabric                                              Home Clothing
* Tara dress – pink quilting fabric,                                           Home Clothing
* Ying Yang gathered top                                                        Home / Work Clothing
* Red ruffle skirt                                                                       Home / Work Clothing
* Blue corset with quilting fabric                                              Home Clothing
* Refashion of pink tops from Big W                                       Home Clothing
* Refashion of black patterned dress from Big W                     Home Clothing
* Refashion of purple patterned dresses from Big W                Home Clothing
* Underskirts / petticoats for summer dresses                            Home / Work Clothing


Future Project Ideas

* Shorts for pole                                                                        Home Clothing
* Olive jacket/ coat                                                                    Home / Work Clothing
* Slips to keep me warm under summer dresses                        Home / Work Clothing
* Duro Dress / top                                                                     Home / Work Clothing
* Over-The-Head 1950s reproduction pattern dress                  Home / Work Clothing
* Bag thing to cover and carry my baby sewing machine         Sewing Gadgets


Fabrics in my stash

* Purple/red/blue knitted fabric
* Fan fabric
* Striped (white base) terry towelling – polycotton – 1.5m, 150cm wide
* Fish (white base) terry towelling – polycotton – scraps
* White/Cream stretch fabric – 100% cotton – 2m, 150cm wide
* Hearts in straight line (white base) stretch fabric – 100% cotton – 1.5m, 150cm wide
* Hearts (white base) stretch fabric – 100% cotton – 1m, 150cm wide
* Green leaves fabric – 100% cotton – 1m, 115 wide
* Green and white Michael miller dandy damask – 100% cotton – 3 yards, 150cm wide
* Red with blue and white whales fabric – 100% cotton – 1.5m, 150cm wide

Stash Busting Ideas

* Top with purple/red/blue knitted fabric Home / Work Clothing
* Tara dress with hearts fabric for nightgown? Home Clothing

Sunday, April 17, 2011

Mod-Cloth Inspired Alterations to a Princess Seam Dress

When I started my new job, and found that there was nothing I liked at the shops, I turned to the internet for inspiration. I browsed, and drooled over the modcloth website. Living in Australia, it's not so practical to buy things off modcloth (shipping makes things very expensive) and takes forever. Plus, this is the first real job I've had after finishing university, so modcloth - and a lot of other clothing stores - are out of my price range.

Some of the dresses though, seemed like good inspiration pieces. 

Take, for example, the 'On the job' dress:


I like the detailing of the gathers at the bust, and the fullness of the skirt. I'm a bit ambivalent about the sleeves, and the collar isn't really my thing.  But the silloheutte is awesome. 

My finished dress looks like this:


So, taking the inspiration of the on the job dress as a starting, inspiration point, I turned to my now favourite, trusty Butterick 4443 pattern. It's a princess seam pattern with a seam on the waist. I can whip the basic version of it up in a few hours. It fits well, and suits me.

It looks like this:


Using this as the basis for my pattern, I altered the pattern to reflect some of the detailing I liked in the modcloth dress.

The first thing I did was alter the sleeves. The sleeves included with the B4443 are cap sleeves. I  like cap sleeves, but find that my arms are bigger than the sleeves are designed for. So, I have to widen them.

Firstly, I trace the pattern piece along with all the original markings (red), and mark the seam allowance (black). 


For this piece, I am happy with how the sleeve sits in the armscye, I just don't like how tight it is around my arm. So, I want to add 4.5cm to the bottom seam. 

To make the alteration even, I will add the 4.5cm in three places - 1.5cm in each. So, I cut the sleeve into thirds.


Now I need to add the extra to the bottom hem. This is where that seam allowance I drew on becomes important. I am not altering how the sleeve fits in the armscye, so I don't want to change that seam length.

Firstly, I tape one of the cut pieces to some newspaper. Lining the seam line up so it touches,


I measure 1.5cm between the cut edges of the hem.


Taping it down, the piece looks like this:


I repeat this process for the other pieces, until I end up with a piece that looks like this:


You will notice that the top edge is not completely smooth where the joins are. I trace this piece, smoothing the curves, and filling in the gaps as I go, until I'm left with a piece that looks like this:


Next, take out your princess seamed pattern. Mine has a seam at the waistline.

Next, I altered the dress pattern. Because I had previously made the dress several times, I knew that the basic pattern fitted me well. I also knew that the seam I wanted to sit under my bust was 10cm from the waistline seam on the existing pattern pieces.

So, I took both of the front pieces (front centre and front side) and marked the side seams 11.5cm from the bottom (this allows for the 1.5cm included seam allowance), and drew a straight line between the marks. I then cut along the line. The first line you can see marked in the photo is the 10cm line, and the second is the 11.5cm line.


I originally lengthened the waist line of this pattern by 3cm, but when I fitted my shell, the back sat really oddly:

The front side panels also sat weirdly:

please excuse the face I'm pulling - it was late.


See how puckered that back and side is? That's because when I lengthened the waist on this pattern, I forgot that I had already lengthened the waist on the pattern I was working from. This is why it is a good idea to mark patterns with any alterations that you have made.

So, I went back and redrafted the pattern without the extra 3cm at the waistline.

Now, one of the features I liked about the on the job dress was the bow at the back that was giving shaping to the back of the dress. There are no shaping seams. So, to recreate this look, I took my side back piece and centre back piece and marked the seam line that would join the two pieces. 

You will notice in a lot of the photos my pattern pieces are taped to newspaper. I do this to stop them moving while I am working with them, before I trace the final pieces to use when cutting out.


Next, I took both pieces and joined the seam line up from the top of the seam.

To do this, I laid the pieces on top of each other. Because I use tissue paper to draft my patterns, you can see through it to the layer below:


I then carefully lined up the seam lines, above the notch:


Because I was lining the seams up above the notch, it meant that the seam line below the notch didn't match up:


Basically, I have gone from a princess line seam to a darted seam. So, if you have a favourite pattern that uses darts, not princess seams, you could use it from here to create this dress.

Next, I traced around the pattern I had made. Because the dart really only added 2cm to the waist line (not nearly enough to add the gather-y look I was after for the back), I measured the side seam, made sure that the new seam line was the same length, and added 6cm to the waist hem line:


You should also mark the point where the seams have been joined at the armscye, as this is the point that the sleeves are added.

Next, I moved on to drafting the front, with the gathers.

I took my shortened centre front and side front pieces, and marked the seam lines again:


I again laid the pieces on top of each other, lining up the top of the seam to create a darted piece once more:


The seams at the hemline are much further apart than on the back piece:


Trace around your pattern pieces, smoothing the hem line, and remembering to add a 1.5 cm seam allowance. You should also mark the point where the seams have been joined at the armscye, as this is the point that the sleeves are added.

(take photo of this)

Next, I moved on to the skirt. I wanted a full skirt, but no gathers or pleats at the waistline, and no seams on the front waistline.

I took the original skirt piece (an A-line skirt), drew on the seam line at the waist, and split it into 4 pieces:


I then added 7 cm between the hem line of each piece, keeping the waist seam line lined up (very similar process to the sleeve alteration)


Do this to both the front and back skirt pieces. For the back piece, I then added 6cm to the centre seam to account for the extra 6cm added to the bodice pieces.

The next step is to add the lower front pieces to the skirt pieces.

I forgot to take photos of this step.

Now, I used the cheats method for this. 

What I do is take the lower front pieces, and mark the waist line seam on them. I then line this seam at the edges with the seam for the skirt, and split the skirt piece where the two bodice pieces touch. The reason that I say it's the cheats version is that there is a half moon of extra fabric between the two seam lines. I don't mind this, and the dress doesn't sit badly with this slight extra fabric, but if you are a perfectionist, you may not like this method.

Lastly, I added a 1.5cm seam allowance to the top of the bodice pieces.

Your pattern is now altered, time for construction!

Now, I didn't take any photos of my construction process (I'm a bad blogger), so you'll just have to bare with me and my dot points. I do suggest making a shell of this dress to check that you can get it on and off, and to check the fit. It doesn't include a zip, so you do need to ensure that the waistline is large enough to fit over your head and shoulders and bust.

Construction:
  • Cut pattern pieces: 2 of each, except centre front skirt and front bodice, which you cut on the fold. Cut from both fabric and lining (I cut my lining 15cm shorter than my main fabric)
  • finish edges (overlock or zig zag stitch) all skirt piece side seams
  • join shoulder seams of bodice pieces. Press seams
  • finish lower edge of sleeve. I used a rolled hem stitch on my overlockers. Sew sleeves to bodice
  • sew lining and main fabric together at neckline and arms. clip seams and turn right side out.
  • sew front skirt to side front skirt. press seams flat
  • add long gather stitches to bodice front 
  • pin skirt front to bodice front
  • gather bodice so that gathers are about 2.5cm wide, above skirt seams
  • sew skirt front to bodice front and skirt back to bodice back
  • press seams upwards
  • sew side seams
  • press open
  • hand stitch along seam allowance along waist seam at back and under bust seam at front to fully enclose bodice (this is why you didn't have to finish any of the bodice seams)
  • top stitch neckline, and arms below sleeves
  • hem. I used a rolled hem from my overlocker.
  • remember that you need a tie at the back. Cut a piece of fabric 10cm wide and 150 cm long. fold in half and sew along the long edge.
  • turn through, and press flat. cut in half and cut off selvage.
  • turn one end in. top stitch along 3 sides (including your turned under end). I finally realised with the left hand needle function was for with this lot of top stitching - it allowed me to stitch about 1.5mm from the edge of the fabric, using the centre of the presser foot as a guide.


  • sew to dress, 8cm from side seam, with the ties facing the front
  • clip corners of ties, fold towards centre back, and sew down
Done! Yay!