Monday, January 10, 2011

Upcycled T-Shirt gifts

I gave my sister an upcycled t-shirt as a Christmas present, and a friend from my sewing group, Squirrel, two upcycled t-shirts as a birthday present. They were really fun to make. 
For each of them, I started with a plain item, sourced from an op shop. In this instance, they were all T-Shirts.
Then, I stared at the t-shirts, and the findings and other fabrics I have in my stash. Picked things up, put them down. Looked at the colour combinations. Swapped things around. Stared some more (seriously, I can stare at things for a long time trying to figure out exactly what I want to do with it. I could be all wanky and say that I want the original items to ‘speak to me,’ but really, it’s just a case of being happy with my colour choices).
For my sister, I started with a blue T-Shirt, and white beads. 
I thought the scoop neck was really cute.
It reminded me of the colour of an outdoor swimming pool. I added rows of white beads, slightly gathering each row, and was was reminded of the line markers for lap swimming. So, the top was named - Lap Lanes.
The beads were added in two places - three rows down the front centre, and five rows on each shoulder.


For Squirrel, I upcycled two T-shirts - because I couldn’t decide which one to give her. Both were grey T-Shirts to start with. (I am growing to really love grey as a base colour to work with. Which is odd, because it is a colour I basically never wear myself.
The first one had a cute, but boring button detail, and cap sleeves


It was just screaming for some bling.
So, I took the buttons off, and added bronze beads and sequins and findings. These were all from an op shop.
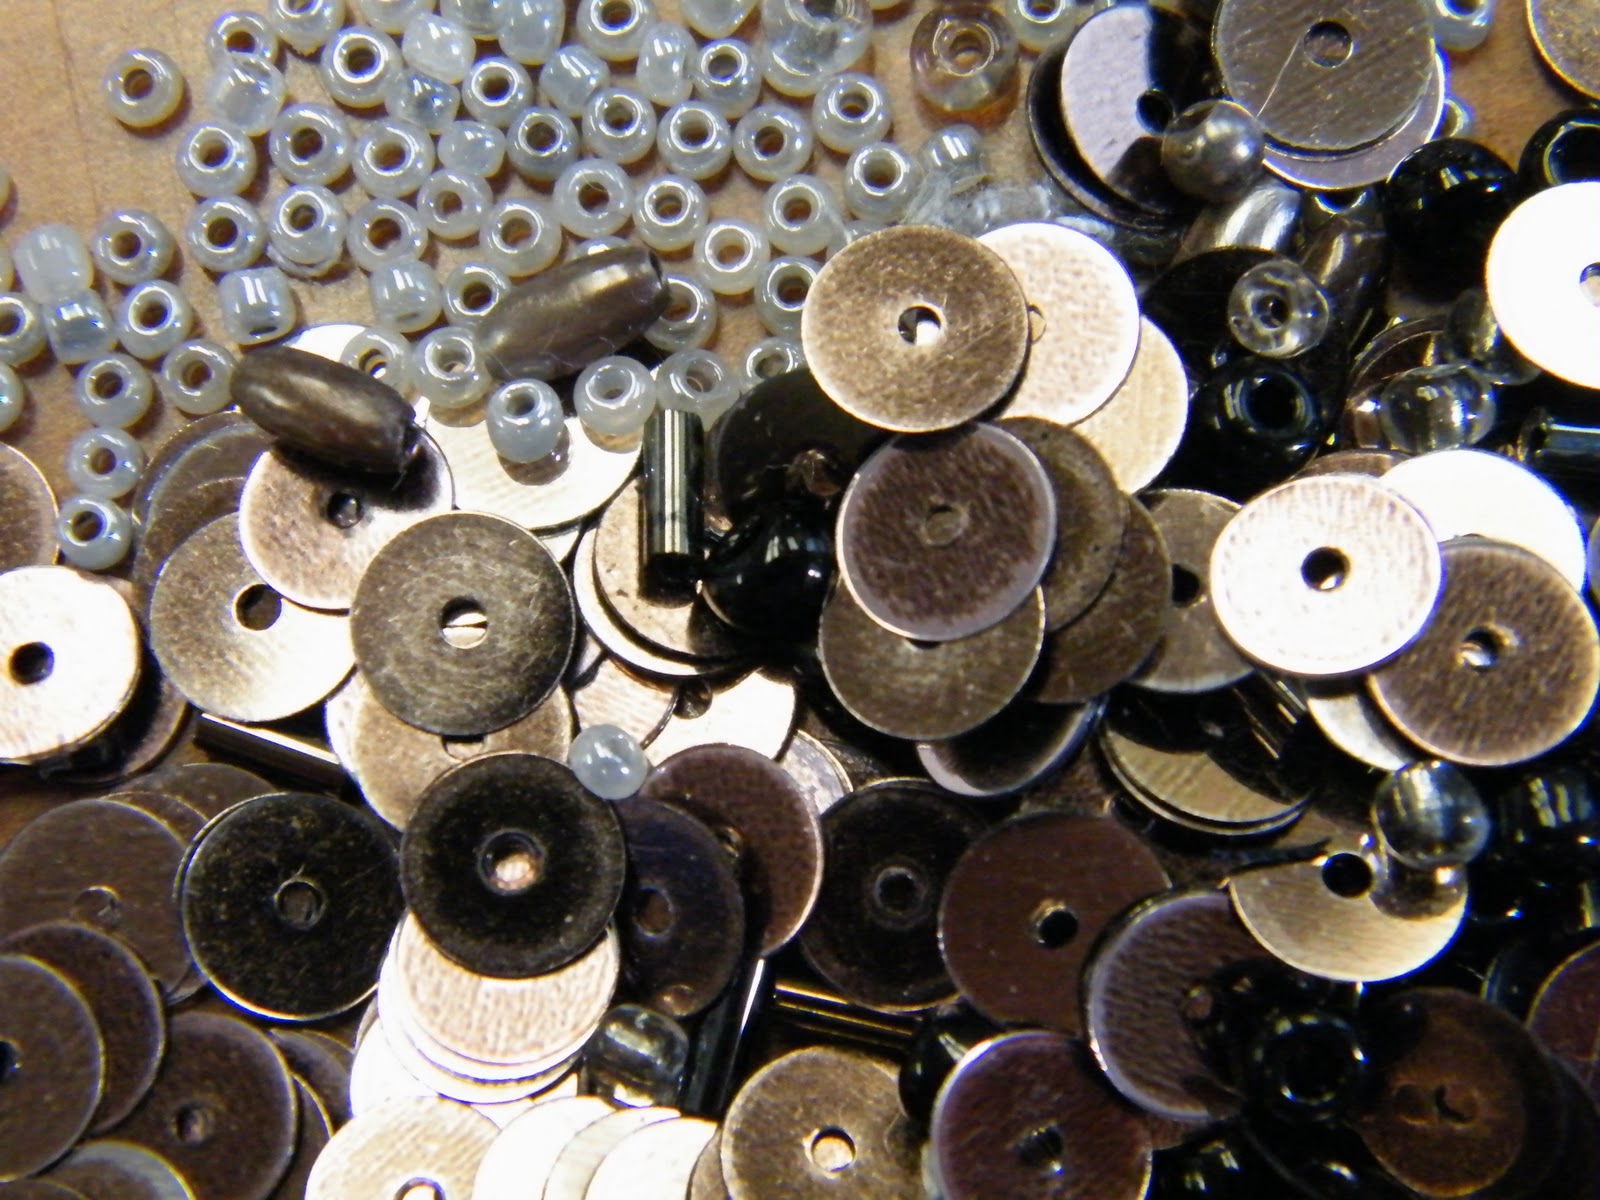

I love beads and sequins - so pretty
In the beads, I found a few bells and coins. These became the start of me design, and then I randomly placed the beads and sequins around them.


The double cap sleeves were doing that annoying turning up hem thing, so I added a row of sequins on each of the hems to hold them down.

And, ‘Bronze, Beads and Bells’ was complete.


The other T-Shirt for Squirrel used reverse applique. I am growing to love it as a technique - it’s so fun, and easy, and because I do it free hand, it’s fun to discover what and where the design goes.
Like with the Birthday Dreamings Tank top, I used a chain stitch, and circles. The grey T-Shirt seemed perfectly suited to a navy thread and navy cut outs. 
I tacked the backing fabric in place before starting to sew, because then I could hold bunches of the fabric in my hand without worrying about it moving or stabbing myself with pins - in some of the photos you can see the tacking stitches before I took them out.
I started my design at the right shoulder seam, and worked down. 

I then turned the T-Shirt over, and worked part of the design down the back, so that the design goes over the shoulder.
Then I cut away the circles.
The blue circles reminded me of lakes, interconnected by waterways, so I named this one ‘River Systems.’


Birthday Dreamings Tank Top

For my birthday (about a month before Christmas, but I’ve been a bad blogger) I received the Alabama Stitch Book. 
Oh, my, the pretty in that book! While I haven’t tried the exact techniques that Natalie Chanin uses (none of the reverse applique I’ve done to date includes any fabric paint), I am loving the book as a source of inspiration.
Using the book as inspiration, on the night of my birthday, I stitched the ‘Birthday Dreamings’ tank top. I used a chain stitch in navy thread, on a navy tank with sky blue cut outs. I’m really happy with how it turned out - and it only took me an hour or so, while I was watching TV. And, I get compliments about it every time I wear it.


Kiwi's Dress

Kiwi, one of the girls in my sewing group, has spent most of the last few months working on a dress.
The dress represents the third thing she has ever sewn - she made the sea horse hat pack, then the bucket hat, and now a dress. An impressive feat, considering that up until she sewed the sea horse, she basically had never touched a sewing machine, or sewed anything, in her life.
(Sorry Kiwi, I know it's not the most flattering photo, but I didn't get another one of you sewing)
Her goal was to have the dress completely finished and wearable by December 18, so that she could wear it to a dance party we were going to.
So, once a fortnight (give or take) we have been having sewing sessions. She learnt some things, and I learnt some things about how much information I just ‘know’ about sewing because I’ve been doing it for years. Just reading a pattern was an interesting task for Kiwi, because sewing has it’s own special language. Things that seemed so obvious to me, were perplexing to her. For example, it just seems normal to me that when a pattern asks you to press something, you iron it. But, as it turns out, that is a sewing (and dry cleaning) specific term. Who knew, right?
In walking Kiwi through the dress, I think I learned almost as much as she did, although we learnt very different things.
And, On December 18, Kiwi finished the dress.
Isn’t it pretty?
I love this photo - Kiwi and her boyfriend look so natural in it.

The sweetheart neck line is perfect for Kiwi, and the colours - red with white detailing - are great on her

She was so proud, and rightly so.
Well done Kiwi!
(And, on a sadder note, Kiwi has subsequently moved to Perth, and will be greatly missed.)

Sunday, December 26, 2010

Edible Christmas Gifts

As I mentioned in a previous post, I have been trying to be good, and have a totally hand-made, hand-baked, thrifted Christmas. I managed this, with only two little exceptions (more about that in another post). 


For some people, this meant they received thrifted gifts. For others, it meant receiving things I had sewn or crafter. And, for others (those that are the subject of this blog), they received things I had baked.


The first round of baking was cookies and biscuits from the CWA (Country Women's Association) cookbook. These were given to twelve of my friends, each with three or four cookies in a packet. I sadly forgot to take any photos, or, for that matter, write down which recipes I used for these gifts, so that's about all I can say on the matter.


The second round of baking was brownies for my secret santa at work, my team mates, and the people from my dance class. So, 18 gifts all up this time. My brownie recipe makes a LOT of browines, but because I was giving so many gifts, I decided to try a variation of it.


My original Brownies:
I adapted the brownie recipe from a friend’s cookbook, which I think was called home food. 


250g butter (I use unsalted)
500g - 600g eating chocolate (I prefer using dark chocolate) (eating chocolate is better quality that cooking chocolate, for about the same price. I figure, why use lesser quality ingredients?)
1 Cup cocoa powder
2 Cups sugar
1 1/2 Cups Plain flour
1 1/2 teaspoon baking powder
6 eggs
1 packet chocolate chips (again, I usually use dark chocolate chips)
*Melt butter and chocolate. 
*Stir in cocoa and sugar. 
*Stir in plain flour and baking powder. 
*Mix in eggs.
*Mix in chocolate chips. 
*Divide mixture into two dishes, if not silicon, line with aluminium foil or baking paper. 
*Bake at 180C / 350C until knife comes out clean. Remember that there are chocolate chips, so this might be a bit tricky, but I have served these slightly undercooked, and because of how much chocolate is in them, they solidify a little as they cool.


My White Chocolate and Macadamia Brownies:

250g butter (I use unsalted)
500g - 600g white eating chocolate 
2 Cups sugar
1 1/2 Cups Plain flour
1 1/2 teaspoon baking powder
6 eggs
1 packet white chocolate chips
1 packet macadamia nuts.
*Melt butter and chocolate. 
*Stir in sugar. 
*Stir in plain flour and baking powder. 
*Mix in eggs.
*Mix in macadamia nuts and chocolate chips. 
*Divide mixture into two dishes, if not silicon, line with aluminium foil or baking paper. 
*Bake at 180C / 350C until knife comes out clean. 

Because I was giving these as gifts, rather than baking in the usual square silicon containers, I used the fairly sizeable collection of silicon cup cake shapes we have. This gave me brownie bites, which hold together better than if I had just cut up a larger portion.

I had found six huge huge wine glasses at an opshop, so I decided to use two of them as presentation of the brownies for my secret santa. I figured that even if he didn't like brownies, he would like large wine glasses what 21 year old male doesn't?)

To present, I filled both glasses with brownie bites, then cut slits in the middle of sheets of cellophane. I slipped the stem of the wine glass through the slit, so that the glass was covered with cellophane when I tied a ribbon around it.

They ended up looking like this:


It wasn't until after I had given them away that I realised that taking photos of green things against a green leafy background is perhaps not the most sensible idea. Ah well, I know for next time.

Next I wrapped up the brownies bites for everyone else. This was a bit easier, because I wasn't wrapping wine glasses, but the fact that I was wrapping 18 of them made it a bit tricky. Partly because I didn't know how many each person was going to end up getting.

So, what I did was lay the cellophane out in rows on the kitchen table. That way, I could just go along the rows adding a brownie to each pile until I was done. I ended up giving each person four brownie bites.

Next, I simply gathered the cellophane up and tied it with curling ribbon. Which I didn't curl.


They looked pretty awesome when they were all together in the boxes.

And, they went down really well :). I was very pleased with the response to them. I hadn't made the which chocolate versions before, but the general consensus was that they were totally edible, and that people would happily eat them again.

The other thing I made as Christmas gifts were fruit mince pies. I normally make about 12 dozen in any given year, and so far this year, I have made 12 1/2 dozen. So, right on target. I might end up making another dozen or two, to take on holidays with me.

The recipe I use isn't mine, it's my mother's. I took over making them when I was about 15, and now they are part of my Christmas routine (the other is making mushroom filled pierogi, an integral part of our Christmas celebrations).

I went overseas a few years back, and wasn't around for Christmas, so mum sent me her recipe. I have simply copied exactly what she sent to me:


FRUIT MINCE PIES 
My mother always says, when offering guests fruit mince pies, that that you get a lucky month every time you eat a mince pie at a different person’s house ie if you visit 12 houses and have a mince pie at each, you will be lucky for the entire year.
PASTRY
1 cup plain flour
1 cup self-raising flour
½ cup cornflour (proper corn cornflour, not wheat cornflour)
¼ cup icing sugar
¼ cup custard powder
250 gram butter
¼ cup iced water, approximately

  1. sift dry ingredients into basin
  2. rub butter in evenly (I use a pastry cutter to cut the butter into the dry ingredients, then finish off with my hands)
  3. add enough water to make ingredients just cling together
  4. knead lightly until smooth (recipe says to do this on a floured surface, but I don’t use flour)
  5. divide pastry into 4 balls
  6. wrap in plastic food wrap and refrigerate for 20 minutes or more
  7. roll pastry – if it has been in the fridge for a while, it will be solid, but it will gradually roll out, and it is actually more workable this way than if it is sticky and soft because it is too warm. 
FRUIT MINCE
ORIGINAL RECIPE:
125 gram beef suet
250 g (1 1/3 cups) seedless raisins, chopped
125g (2/3 cup) currants
60g (1/2 cup) chopped almonds
30g (1/3 cup) chopped mixed peel
45g (1/4 cup) chopped dried figs
30g (1/4 cup) chopped dried apricots
30g (1/4 cup) chopped dates
2 medium apples, peeled, cored and grated
125g (1/2 cup) sugar
½ teaspoon ground nutmeg
½ teaspoon ground mixed spice
½ teaspoon ground cinnamon
½ teaspoon ground cloves
300 mls (1 ¼ cups) brandy
125 mls (1/2 cup) medium sherry
separate beef suet from tissues and chop finely in a food processor or with a French knife dipped in flour (butcher may do this).  Place all ingredients in a mixing bowl and stir together with a wooden spoon until all are moist.  Cover bowl with a plate or tea towel (not plastic wrap) and store in a cool dry place for 2 weeks, checking every five days and add 3 tablespoons extra brandy or sherry if fruit has absorbed all liquid.   Pack into clean stoneware or glass jars, cover surface with a circle of waxed paper, then cover securely with cellophane paper or tops of jars.
WOJTASISED RECIPE
Start out with double quantities:
1 kilo pack of mixed fruit (avoiding the type with glace cherries because I hate glace fruit)
4 medium apples, peeled, cored and grated
Add (quatity varies according to what is available and how much gets eaten whilst making fruit mince):
1 or 2 packets of almonds (could be 125g packet but who reads labels)
Wheel of dried figs
Packet of dried apricots (again, who reads labels)
Dates optional because they’re not my favourite commodity
Mince all of the above in a mincer (I have never tried a food processor, but suspect it would have to be watched carefully to ensure that the fruit mince remains in small bits rather than homogenous mush)
Transfer to a large mixing bowl and add the following:
250g (1 cup) sugar
1 teaspoon ground nutmeg
1 teaspoon ground mixed spice
1 teaspoon ground cinnamon
1 teaspoon ground cloves
Add some brandy and sherry while restraining Chris (my father) from going overboard on soaking the mince in grog. Use mince immediately for the first batch of pies (because everything has been left until the last minute as usual).  Cover bowl with plastic wrap and store remainder in fridge, using as needed for more mince pies.
The fruit mince pie tins I use have a fairly shallow, round mould, so that the pies have a round base without sides, and I like a pastry star on top, rather than a lid.  
We usually make two types of pies: the ones with fruit mince we made that year, and stronger ones with fruit mince we made the year before. Now, before you freak out, remember that our version has NO MEAT in it. None. It's mostly dried fruit and alcohol. So, we put a decent amount in a sealable jar, add a few inches of brandy or sherry on top, and put it in the back of the fridge for a year. These pies really are quite alcoholic - I'm pretty sure that there is too much alcohol to disappear totally when they are baked.
This year, my great-aunt was coming to our Christmas celebrations, and she is gluten-intollerant. So, in addition to the normal pastry, I also made gluten free pastry. I used a pizza and pastry gluten free mix, and followed the recipe on the packet for short crust pastry. They turned out very well, if I do say so myself.
My gluten-free-great-aunt was given some fruit mince pies for Christmas, as was my secret santa. (My extended family is quite large, and we instigated a secret santa for part of the family this year. It worked quite well, amazingly).


Sunday, November 21, 2010

I'm a bad blogger

Gah!

I am working on like ten projects at the moment, but I haven't finished anything, and almost everything I am working on is a Christmas present, so I can't post about it until after Christmas anyway. Which is making me a bad blogger.

I would promise to blog again soon, but I have no idea the next time I will be making something for myself, or indeed something that I can blog about - so, until then, thanks for reading, and I (hope) to be back, and sewing more frequently, after Christmas.

Thursday, November 4, 2010

Simple refashion - skirt to shorter skirt

So, this is a really really easy refasion.

I started with this skirt.


The skirt was too tight around the waist, so I cut most of the top panel off, leaving enough to fold down to make a casing for elastic. To do this, I turned the skirt inside out, folded the top panel down to the ruffle, and pinned along the lower seam of the ruffle. Using this as a guide, I cut about 1.5cm past the line of pins.


This gave me a panel above the ruffle of about 5cm.


Next, I folded the panel in half, and folded it down over the back of the ruffle and pinned it in place.

Turning the skirt right side out, I sewed along the original line of stitching, leaving a gap of about 5cm to allow me to thread the elastic into it. Looking at the inside of the skirt, this created a casing I could feed elastic through.


I fed elastic into the casing, stitched the gap closed.


And, I had one upcycled skirt - cute pattern, cute length.

Monday, November 1, 2010

Wardrobe refashion

I have signed up for the wardrobe refashion challenge. For two whole months! Eek! So exciting and scary all rolled into one.

So, as part of my sign up, I am posting my pledge here.

I fyrefairee pledge that I shall abstain from the purchase of "new" manufactured items of clothing, for the period of 2 months. I pledge that i shall refashion, renovate, recycle preloved items for myself with my own hands in fabric, yarn or other medium for the term of my contract. I pledge that I will share the love and post a photo of my refashioned, renovoted, recycled, crafted or created item of clothing on the Wardrobe Refashion blog, so that others may share the joy that thy thriftiness brings! Signed fyrefairee.


wardroberefashion.jpg