
When I started my new job, and found that there was nothing I liked at the shops, I turned to the internet for inspiration. I browsed, and drooled over the modcloth website. Living in Australia, it's not so practical to buy things off modcloth (shipping makes things very expensive) and takes forever. Plus, this is the first real job I've had after finishing university, so modcloth - and a lot of other clothing stores - are out of my price range.
Some of the dresses though, seemed like good inspiration pieces.
Take, for example, the 'On the job' dress:

I like the detailing of the gathers at the bust, and the fullness of the skirt. I'm a bit ambivalent about the sleeves, and the collar isn't really my thing. But the silloheutte is awesome.
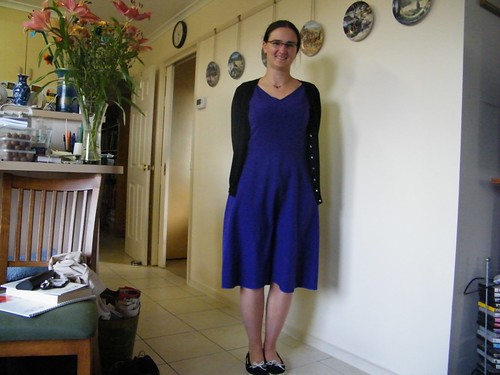
My finished dress looks like this:

So, taking the inspiration of the on the job dress as a starting, inspiration point, I turned to my now favourite, trusty Butterick 4443 pattern. It's a princess seam pattern with a seam on the waist. I can whip the basic version of it up in a few hours. It fits well, and suits me.
It looks like this:
Using this as the basis for my pattern, I altered the pattern to reflect some of the detailing I liked in the modcloth dress.
The first thing I did was alter the sleeves. The sleeves included with the B4443 are cap sleeves. I like cap sleeves, but find that my arms are bigger than the sleeves are designed for. So, I have to widen them.
Firstly, I trace the pattern piece along with all the original markings (red), and mark the seam allowance (black).

For this piece, I am happy with how the sleeve sits in the armscye, I just don't like how tight it is around my arm. So, I want to add 4.5cm to the bottom seam.
To make the alteration even, I will add the 4.5cm in three places - 1.5cm in each. So, I cut the sleeve into thirds.

Now I need to add the extra to the bottom hem. This is where that seam allowance I drew on becomes important. I am not altering how the sleeve fits in the armscye, so I don't want to change that seam length.
Firstly, I tape one of the cut pieces to some newspaper. Lining the seam line up so it touches,

I measure 1.5cm between the cut edges of the hem.

Taping it down, the piece looks like this:

I repeat this process for the other pieces, until I end up with a piece that looks like this:

You will notice that the top edge is not completely smooth where the joins are. I trace this piece, smoothing the curves, and filling in the gaps as I go, until I'm left with a piece that looks like this:

Next, take out your princess seamed pattern. Mine has a seam at the waistline.
Next, I altered the dress pattern. Because I had previously made the dress several times, I knew that the basic pattern fitted me well. I also knew that the seam I wanted to sit under my bust was 10cm from the waistline seam on the existing pattern pieces.
So, I took both of the front pieces (front centre and front side) and marked the side seams 11.5cm from the bottom (this allows for the 1.5cm included seam allowance), and drew a straight line between the marks. I then cut along the line. The first line you can see marked in the photo is the 10cm line, and the second is the 11.5cm line.

I originally lengthened the waist line of this pattern by 3cm, but when I fitted my shell, the back sat really oddly:

The front side panels also sat weirdly:
 |
| please excuse the face I'm pulling - it was late. |
See how puckered that back and side is? That's because when I lengthened the waist on this pattern, I forgot that I had already lengthened the waist on the pattern I was working from. This is why it is a good idea to mark patterns with any alterations that you have made.
So, I went back and redrafted the pattern without the extra 3cm at the waistline.
Now, one of the features I liked about the on the job dress was the bow at the back that was giving shaping to the back of the dress. There are no shaping seams. So, to recreate this look, I took my side back piece and centre back piece and marked the seam line that would join the two pieces.
You will notice in a lot of the photos my pattern pieces are taped to newspaper. I do this to stop them moving while I am working with them, before I trace the final pieces to use when cutting out.

Next, I took both pieces and joined the seam line up from the top of the seam.
To do this, I laid the pieces on top of each other. Because I use tissue paper to draft my patterns, you can see through it to the layer below:

I then carefully lined up the seam lines, above the notch:

Because I was lining the seams up above the notch, it meant that the seam line below the notch didn't match up:

Basically, I have gone from a princess line seam to a darted seam. So, if you have a favourite pattern that uses darts, not princess seams, you could use it from here to create this dress.
Next, I traced around the pattern I had made. Because the dart really only added 2cm to the waist line (not nearly enough to add the gather-y look I was after for the back), I measured the side seam, made sure that the new seam line was the same length, and added 6cm to the waist hem line:

You should also mark the point where the seams have been joined at the armscye, as this is the point that the sleeves are added.
Next, I moved on to drafting the front, with the gathers.
I took my shortened centre front and side front pieces, and marked the seam lines again:

I again laid the pieces on top of each other, lining up the top of the seam to create a darted piece once more:

The seams at the hemline are much further apart than on the back piece:

Trace around your pattern pieces, smoothing the hem line, and remembering to add a 1.5 cm seam allowance. You should also mark the point where the seams have been joined at the armscye, as this is the point that the sleeves are added.
(take photo of this)
Next, I moved on to the skirt. I wanted a full skirt, but no gathers or pleats at the waistline, and no seams on the front waistline.
I took the original skirt piece (an A-line skirt), drew on the seam line at the waist, and split it into 4 pieces:

I then added 7 cm between the hem line of each piece, keeping the waist seam line lined up (very similar process to the sleeve alteration)


Do this to both the front and back skirt pieces. For the back piece, I then added 6cm to the centre seam to account for the extra 6cm added to the bodice pieces.
The next step is to add the lower front pieces to the skirt pieces.
I forgot to take photos of this step.
Now, I used the cheats method for this.
What I do is take the lower front pieces, and mark the waist line seam on them. I then line this seam at the edges with the seam for the skirt, and split the skirt piece where the two bodice pieces touch. The reason that I say it's the cheats version is that there is a half moon of extra fabric between the two seam lines. I don't mind this, and the dress doesn't sit badly with this slight extra fabric, but if you are a perfectionist, you may not like this method.
Lastly, I added a 1.5cm seam allowance to the top of the bodice pieces.
Your pattern is now altered, time for construction!
Now, I didn't take any photos of my construction process (I'm a bad blogger), so you'll just have to bare with me and my dot points. I do suggest making a shell of this dress to check that you can get it on and off, and to check the fit. It doesn't include a zip, so you do need to ensure that the waistline is large enough to fit over your head and shoulders and bust.
Construction:
- Cut pattern pieces: 2 of each, except centre front skirt and front bodice, which you cut on the fold. Cut from both fabric and lining (I cut my lining 15cm shorter than my main fabric)
- finish edges (overlock or zig zag stitch) all skirt piece side seams
- join shoulder seams of bodice pieces. Press seams
- finish lower edge of sleeve. I used a rolled hem stitch on my overlockers. Sew sleeves to bodice
- sew lining and main fabric together at neckline and arms. clip seams and turn right side out.
- sew front skirt to side front skirt. press seams flat
- add long gather stitches to bodice front
- pin skirt front to bodice front
- gather bodice so that gathers are about 2.5cm wide, above skirt seams
- sew skirt front to bodice front and skirt back to bodice back
- press seams upwards
- sew side seams
- press open
- hand stitch along seam allowance along waist seam at back and under bust seam at front to fully enclose bodice (this is why you didn't have to finish any of the bodice seams)
- top stitch neckline, and arms below sleeves
- hem. I used a rolled hem from my overlocker.
- remember that you need a tie at the back. Cut a piece of fabric 10cm wide and 150 cm long. fold in half and sew along the long edge.
- turn through, and press flat. cut in half and cut off selvage.
- turn one end in. top stitch along 3 sides (including your turned under end). I finally realised with the left hand needle function was for with this lot of top stitching - it allowed me to stitch about 1.5mm from the edge of the fabric, using the centre of the presser foot as a guide.


- sew to dress, 8cm from side seam, with the ties facing the front
- clip corners of ties, fold towards centre back, and sew down
Done! Yay!

No comments:
Post a Comment