

So, I have been meaning to fix the fit for a while. My sewing basket challenge seemed the perfect time.
I looked up a number of different shirring tutorials, like the ones from ~Ruffles and Stuff~, Pretty Ditty, and Your Fabric Place.
I have never shirred before. I've never really had a reason to shirr before, but the overly loose retro top seemed the perfect place to start. I read the tutorials, and started.
Now, I was going to be dedicated and draw lines on the top, but decided that it was far too much effort and work, and really just too hard to mark the top - mainly because the hemline is not straight, so I couldn't just mark the lines using a ruler. (This is why the picture above has a ruler, tailor's wheel and tracing paper in it).
So, I decided to use the previous line of stitching as the guide. Taking the advise of the tutorials, I wound my bobbin my hand, and then loaded it in my bobbin case. At first, I threaded the elastic through the tension plates, but it got stuck. So, I loaded the bobbin without sending the elastic though the tension plates.
I began my first row of stitches by following the existing hem line. I didn't back stitch at the beginning of the seam. As I returned to the start of the seam, I angled the seam, so that I could continue in a spiral around the shirt. I left about 2 mm between the side of the presser foot and the previous line of stitching. I kept going round and round until the bobbin ran out of thread.
As I added more rows of stitching, the top became more and more gathered. Because of this, I stretched the fabric, so that it was flat.
When the bobbin ran out of thread, I simply re wound it, and kept sewing. I repeated this process until I got to my bust line. At my bust line, or the point where you would put an empire seam, I stopped sewing.
 |
| The gathers stop at the empire line, just below my bust - you can see the end of the gathers in the lighter fabric. |
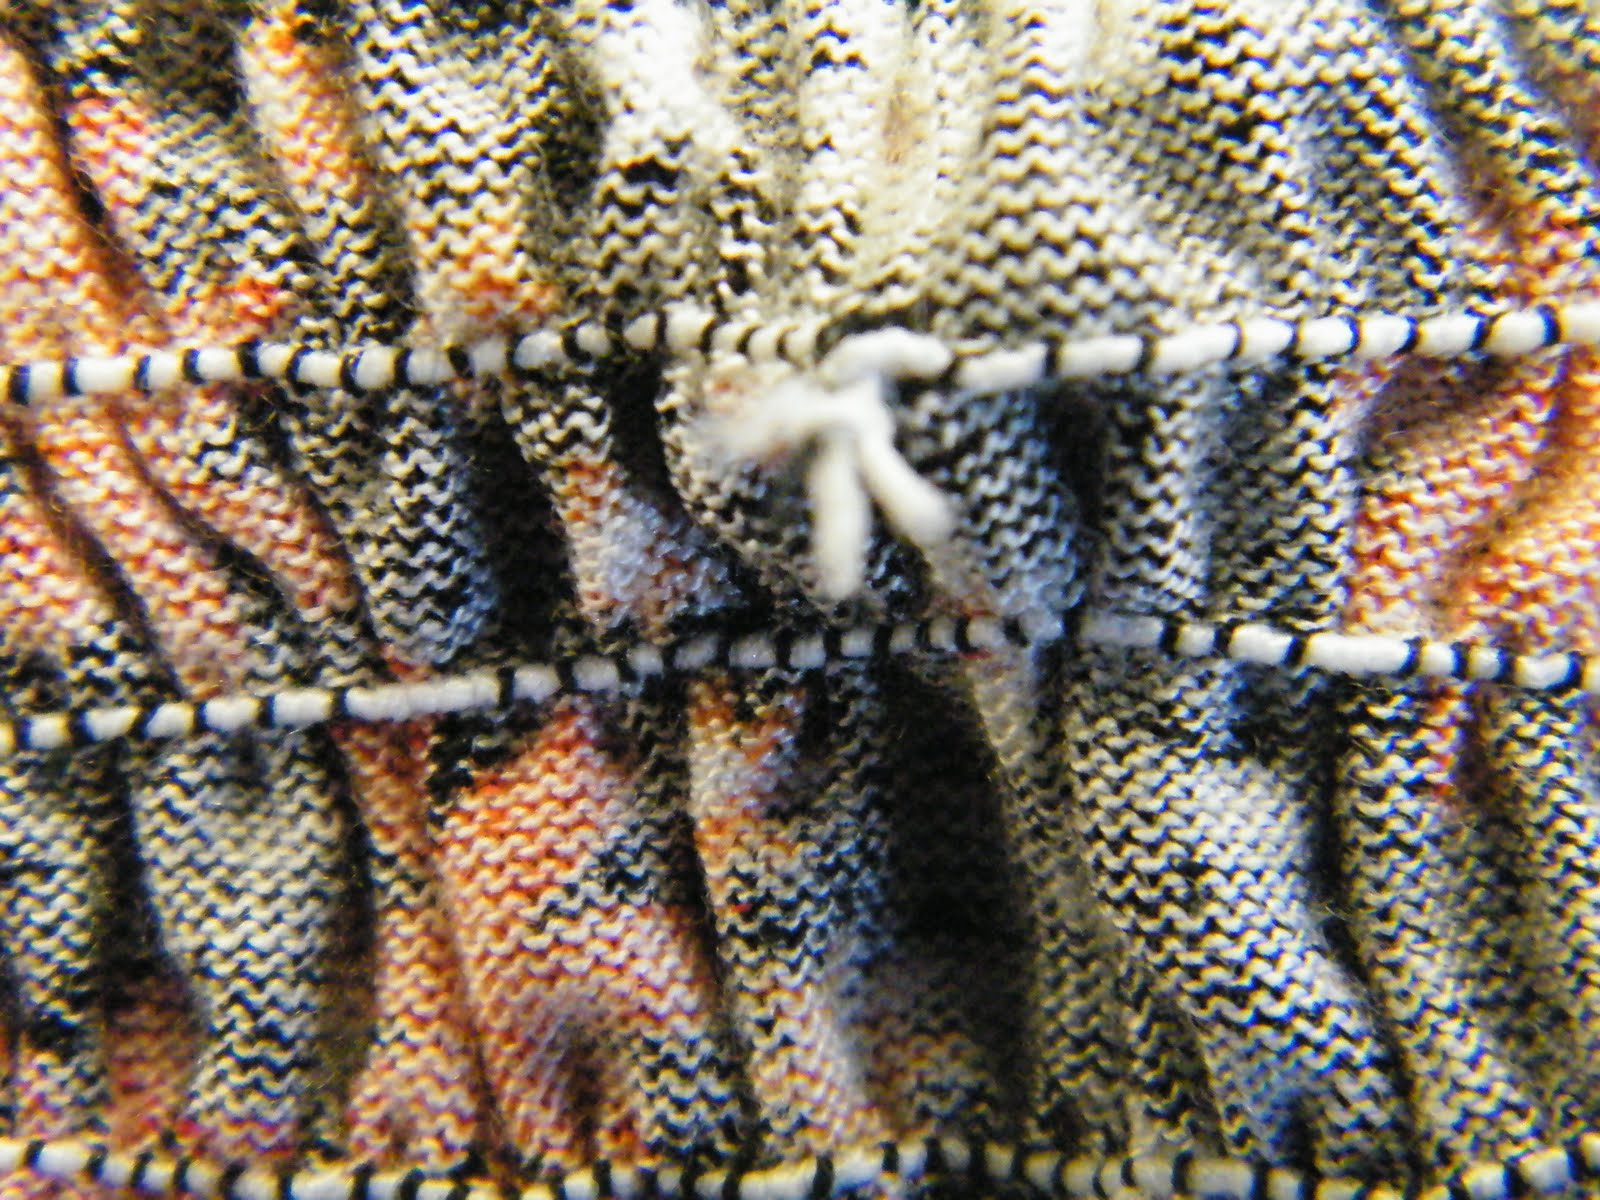
Because the bobbin was hand woven, the tension was not even, so the thread broke a few times while I was sewing. I threaded the loose (broken) threads, and took them to the wrong (inside) of the top. I then caught the thread with a few stitches, and wove the loose end along the line of stitching for about two (2) inches or five (5) centimetres.
Lastly, I pulled the treads at the beginning and end of each piece of elastic through to the inside of the top, and tied the two ends of the threads, and the two ends of the elastic in a knot against the fabric, and cut off the loose ends.
Because I cheated and didn't draw any guide lines onto the top, my lines of shirring weren't perfect. They weren't totally parallel, but in the end, that doesn't really matter. The top looks like it is even.


And, there, TA-DA! My non-wearable top is now wearable.
No comments:
Post a Comment